
Want to learn a quick and easy way to modify and enhance your photos?
In this Gimp layers tutorial you will learn many ways to mod your images and make them pop.
- Moving layers in Gimp
- How to Layer from selection
- Showing Gimp Layers
- Scaling Gimp Layers
- Change layer density
- And more
To show you how to use Gimp layers we’re going to take this basic image, split the house out, and make only the house more large.
Let’s dive in.
First Let’s Enlarge the Image
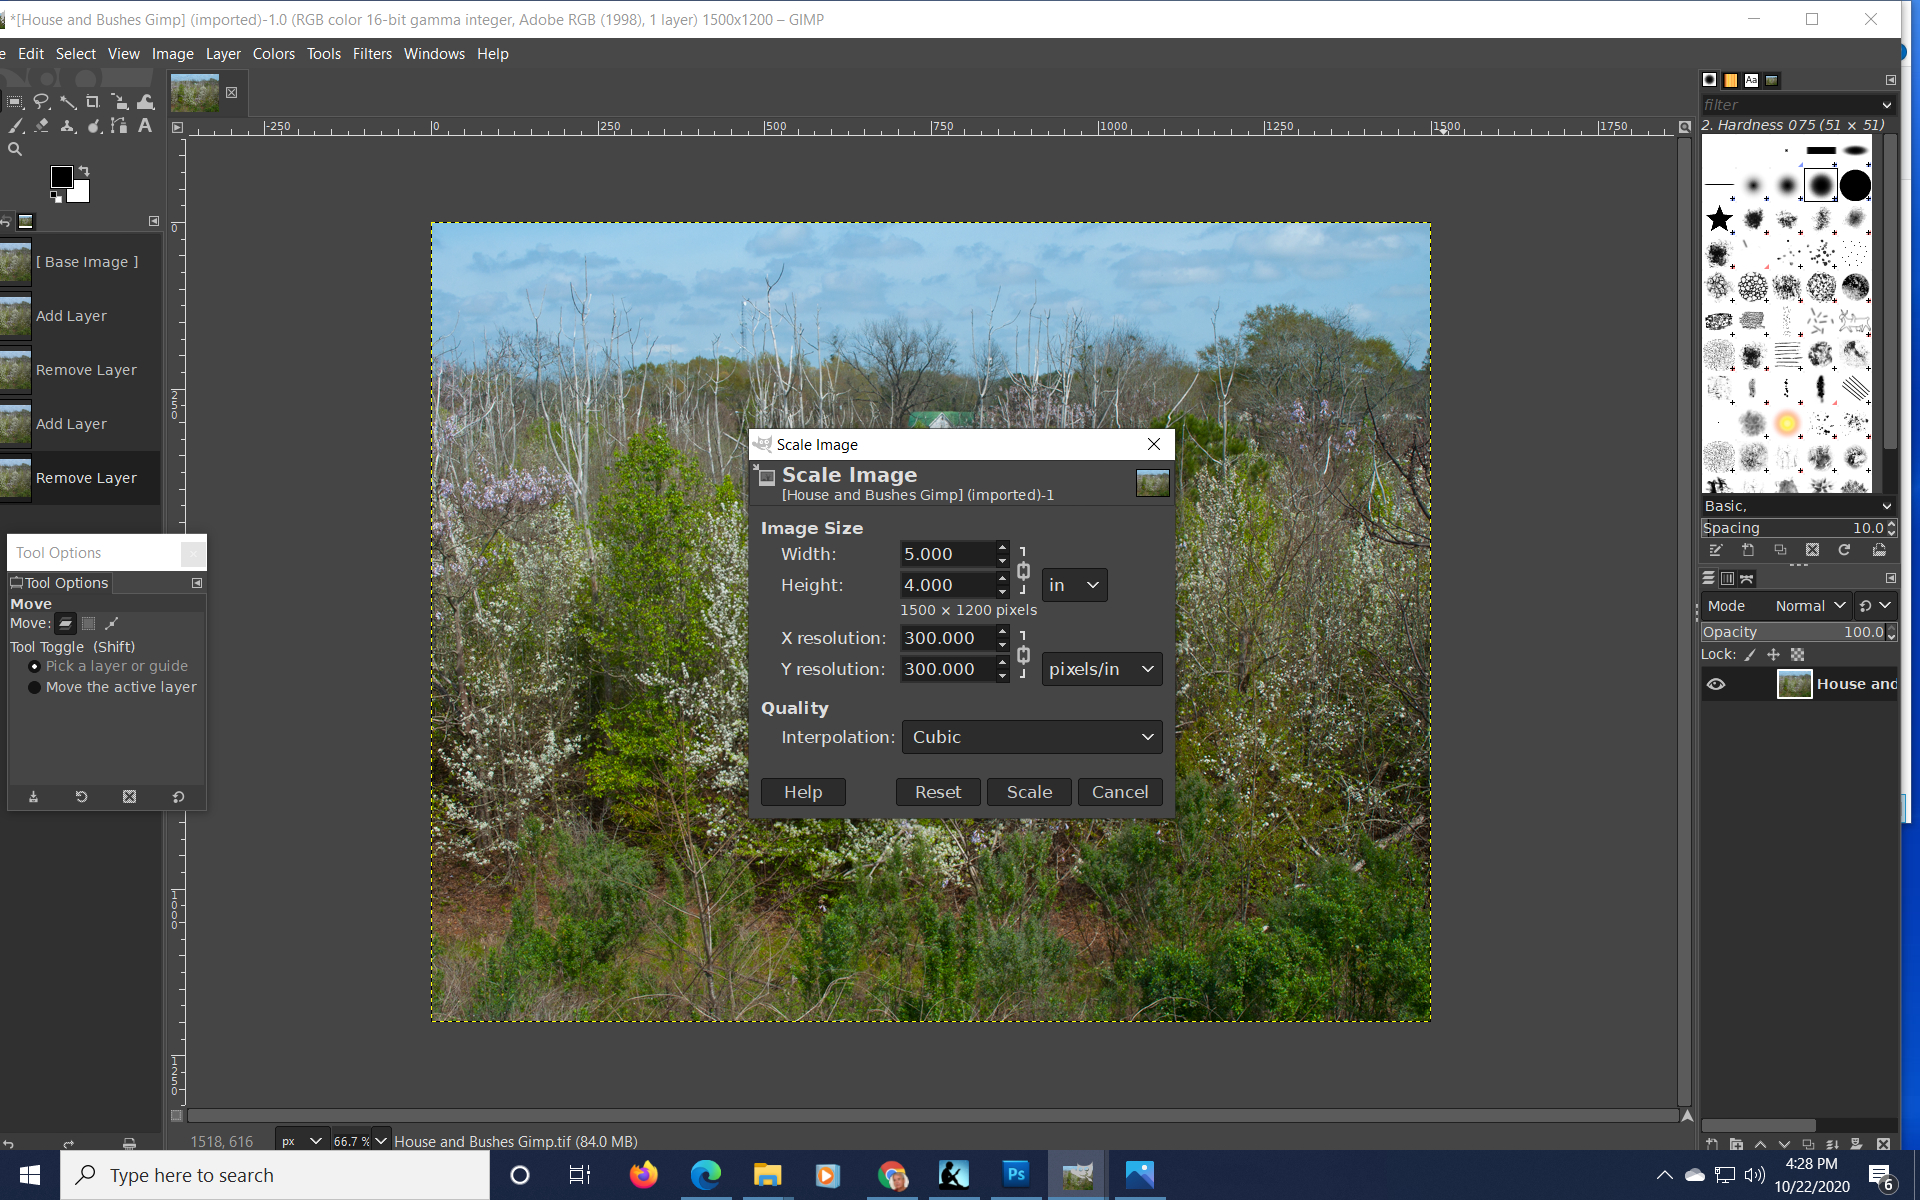
Open the image menu at the top of your screen. Now click scale image and a dialog appears inside your photo. By default, the window shows dimensions in pixels, which number1500 for the width and 1200 for the height. At the bottom of the scale image window, the pixel count is given as 300 pixels per inch.
Go to the window labeled px (for pixels) and change it to inches. This will show your image as a 4×5. The pixel count remains at 300 ppi.
Close the Chain and Keep the Aspect Ratio
So long as the chain icons beside the boxes are closed, Gimp will process images only with the same aspect ratio. For example, if the chain dialog is linked and you replace the “4” in 4×5 with an 8, Gimp will deliver your new image as an 8×10. That’s because the dimensions of an 8×10 will match the 4×5 in terms of their relationship to each other.
The width and height of both the 4×5 and 8×10 have an aspect ratio of 1 x1.25 — that is, their lengths are exactly 1.25 times longer than their heights.
If you were to unlock the chain by clicking it, and enter dimensions which do not match this ratio, your picture would look much different — even distorted.
Changing the Image Size
Let’s go ahead and change your 4×5 to an 8×10. Just replace the 4 with an 8. Now click the scale image button and Gimp will do the rest.
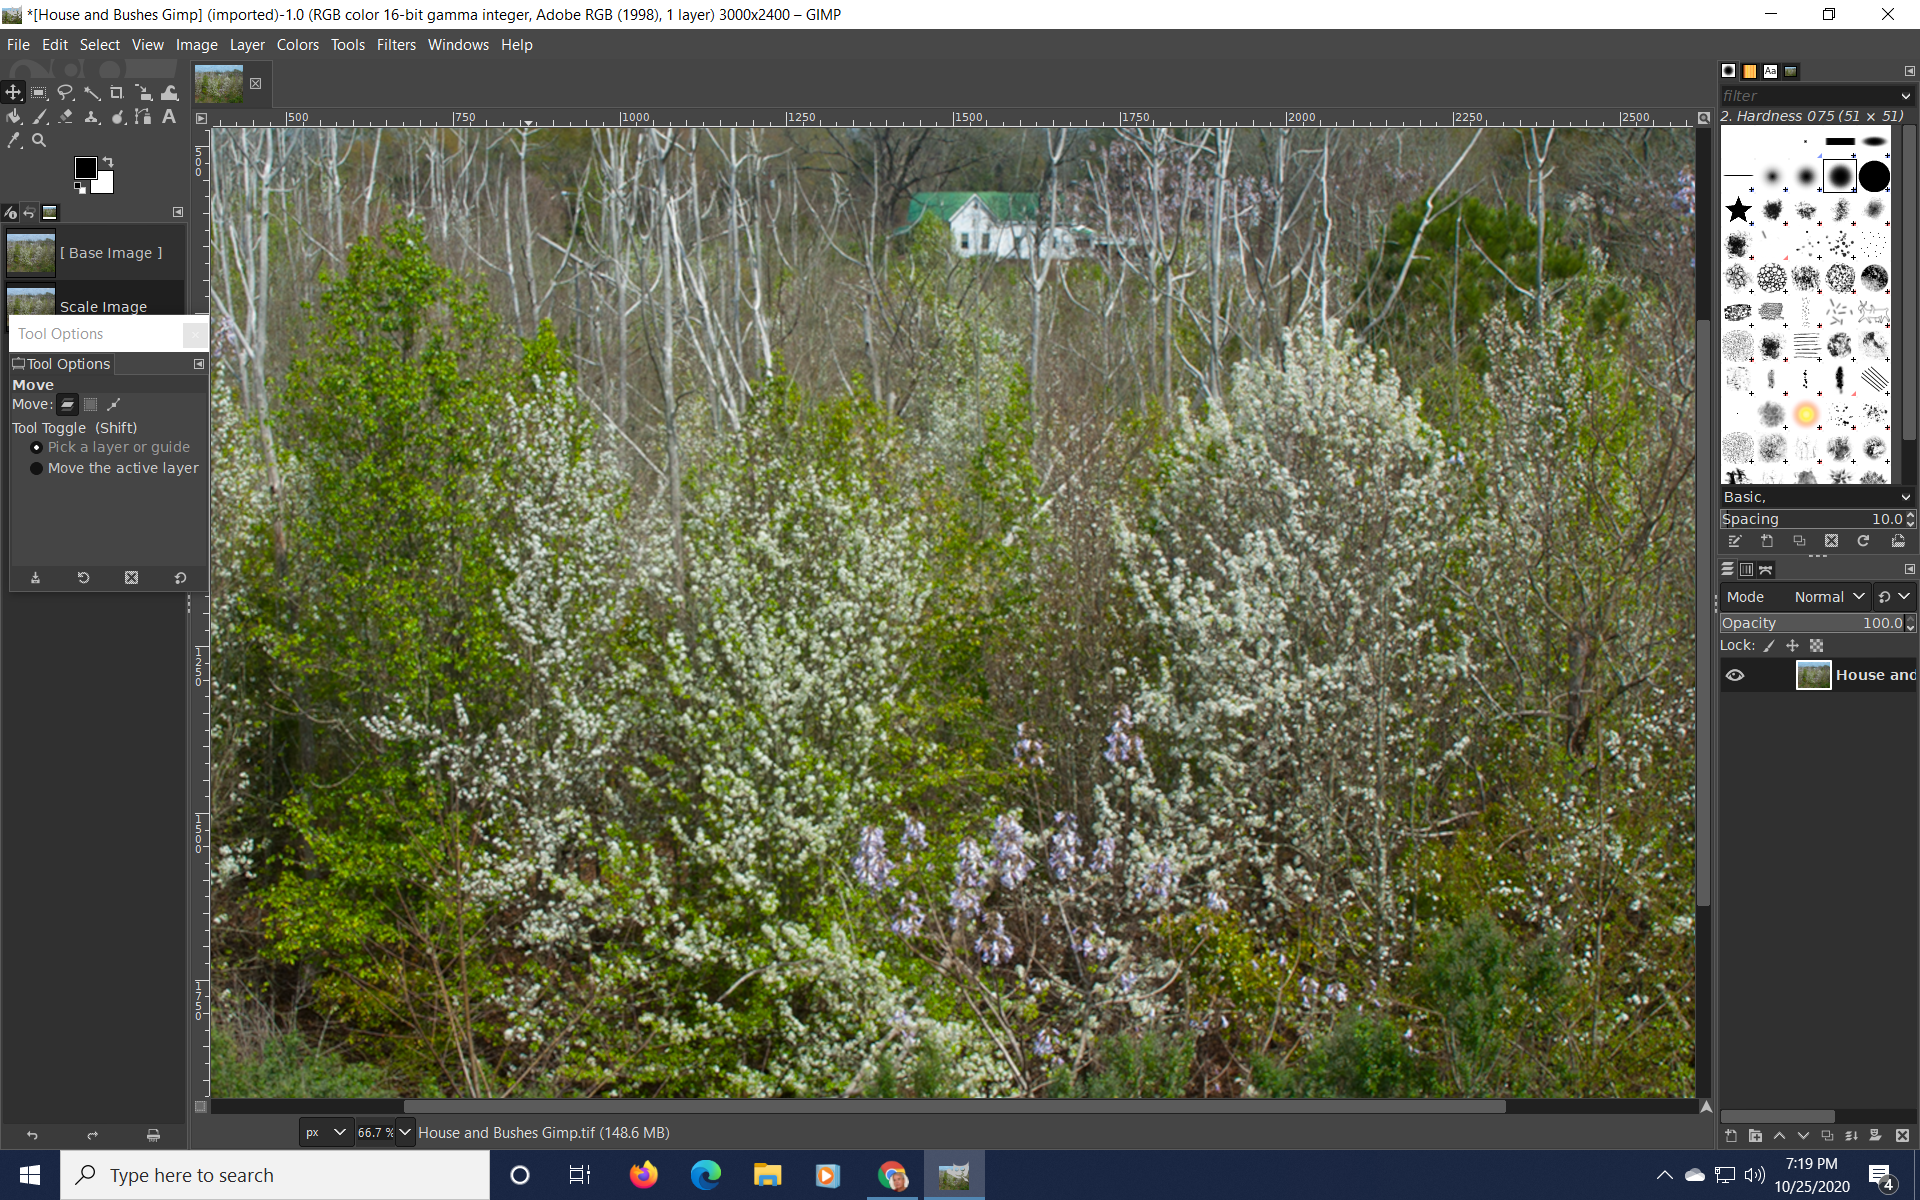
Whoa! What just HAPPENED? Well, we can’t see the entire image any longer, but we know it’s in there somewhere.

Not to worry, though. You can change it back. Pull up the scale image window and confirm the size. It’s an 8×10 all right, and we only changed one number. Notice that the resolution is still 300 dpi.
Press Control + Z to return to your 4×5.
Understanding Resolution
Both our images have a resolution of 300 pixels per inch for both X (horizontal) and Y (vertical).
Resolution determines how sharp your image will appear at a given size and distance. Changing the values in Gimp could make your pictures bigger or smaller, with more or fewer pixels.
But where do added pixels come from, you may ask. The process is called interpolation. In a nutshell, it’s the manufacture of needed pixels or the “throwing out” of “extra” ones. The workings are a bit more complicated, but for now it’s all you need to know.
Think of pixels as a kind of “illusion.” They’re packed so close together that we see them as a single image. Too few pixels and the quality suffers. Too many and the file is much too large.
Layers: the Stuff of Creativity
Now open the layers menu on the upper left of your screen and click duplicate layer. To your right you’ll find two tiny images with “eye” icons beside them. The layer on the bottom represents the base image, which you should never try to mark or change in any way.
Above the base, surrounded with a white frame, is the duplicate image you’ve just created.
A white frame around a layer, means it’s the active layer, or the layer you’re working on currently. The eye means you’re seeing the effect it’s having on your image. It’s your option to click this icon on or off for a full view of the layer underneath.
Next, above your active layer, find the opacity bar and change the setting to around 50 or so. This makes the layer semi-transparent to show the original, or base layer.
Okay, now for the big move. We have the option to use the scale layer command. But for this operation I prefer the scale tool. Go to tools + transform tools and select Scale. This creates a line frame around your photo.
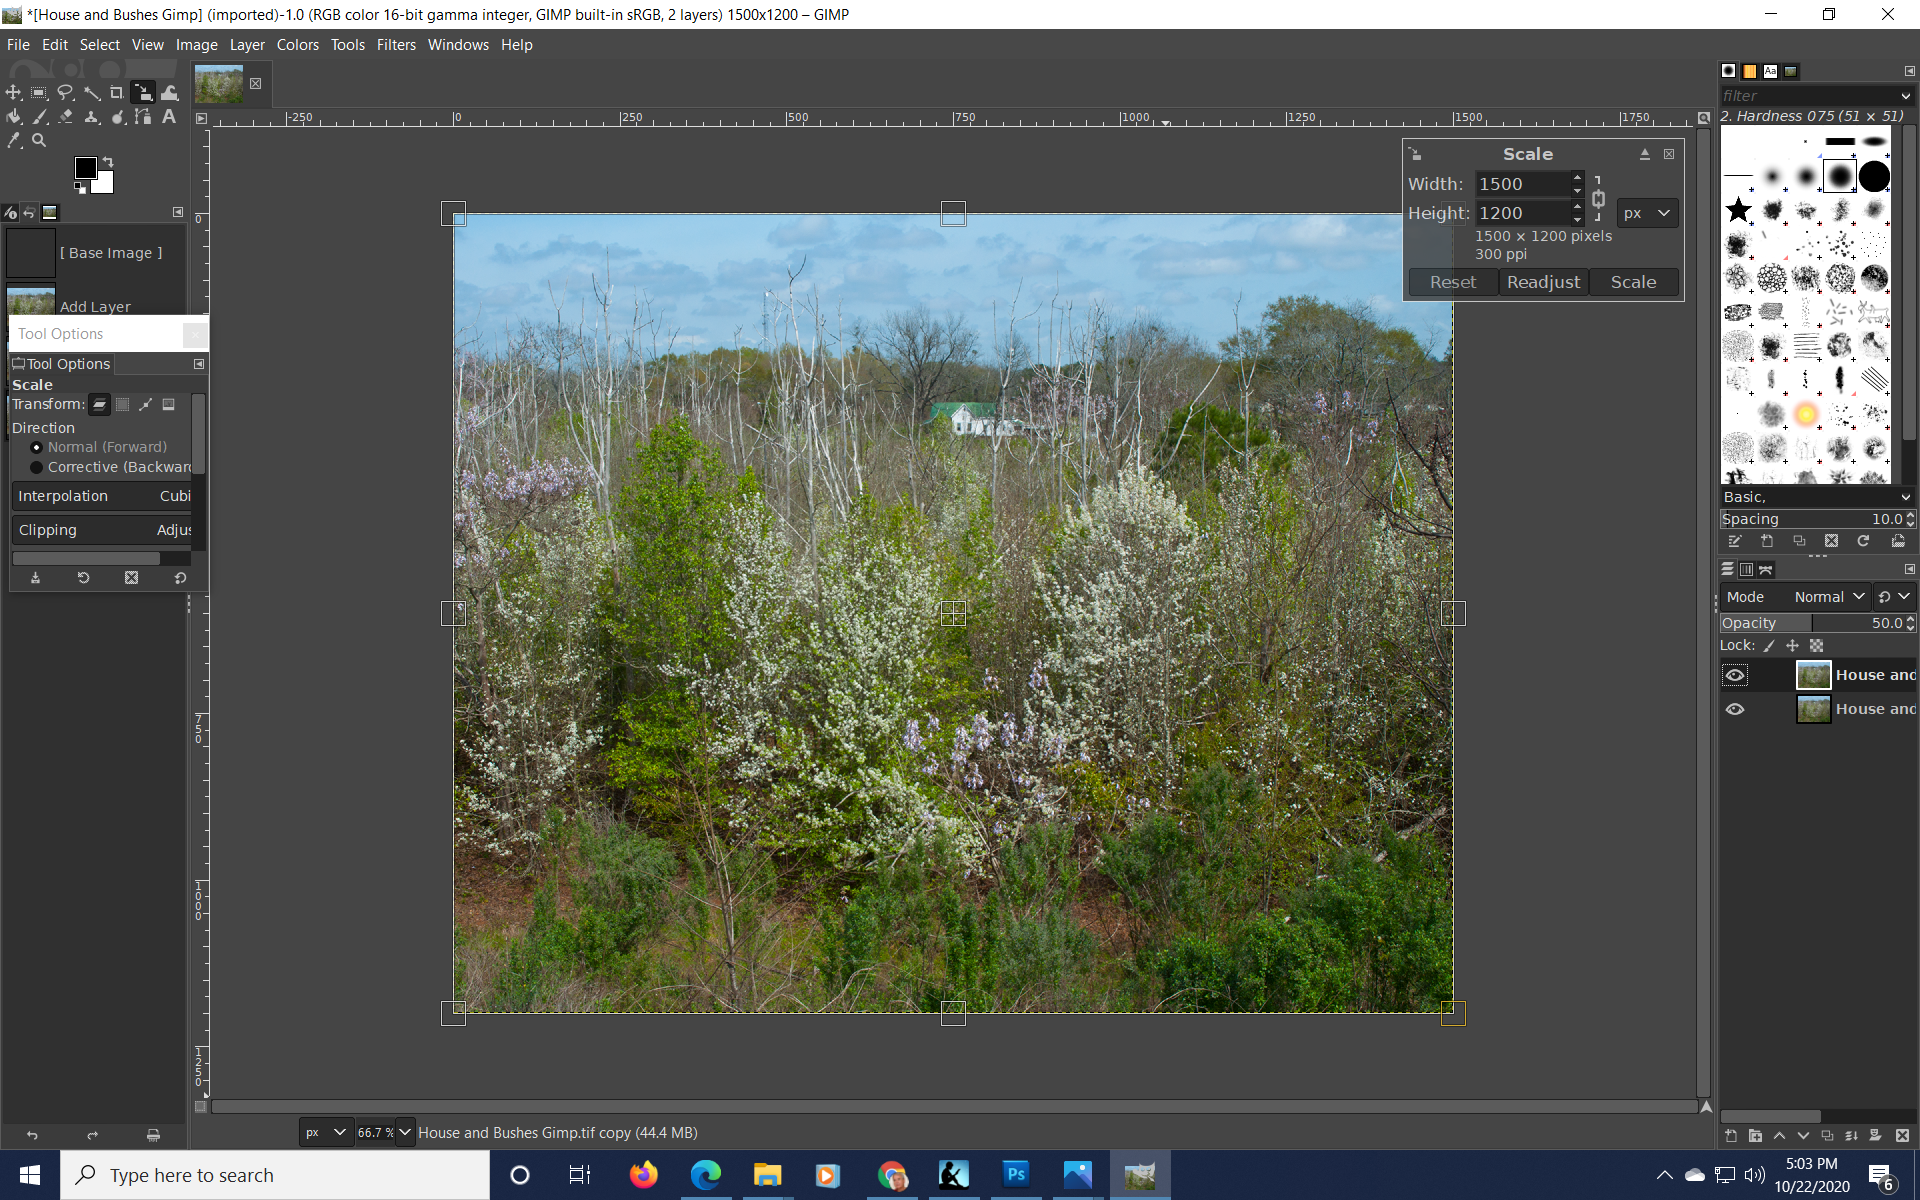
Expand the Layer with the Scaling Tool
Place your cursor at the edge of the frame and draw your new layer away from the image. The upper image — but not the base — will expand in size.
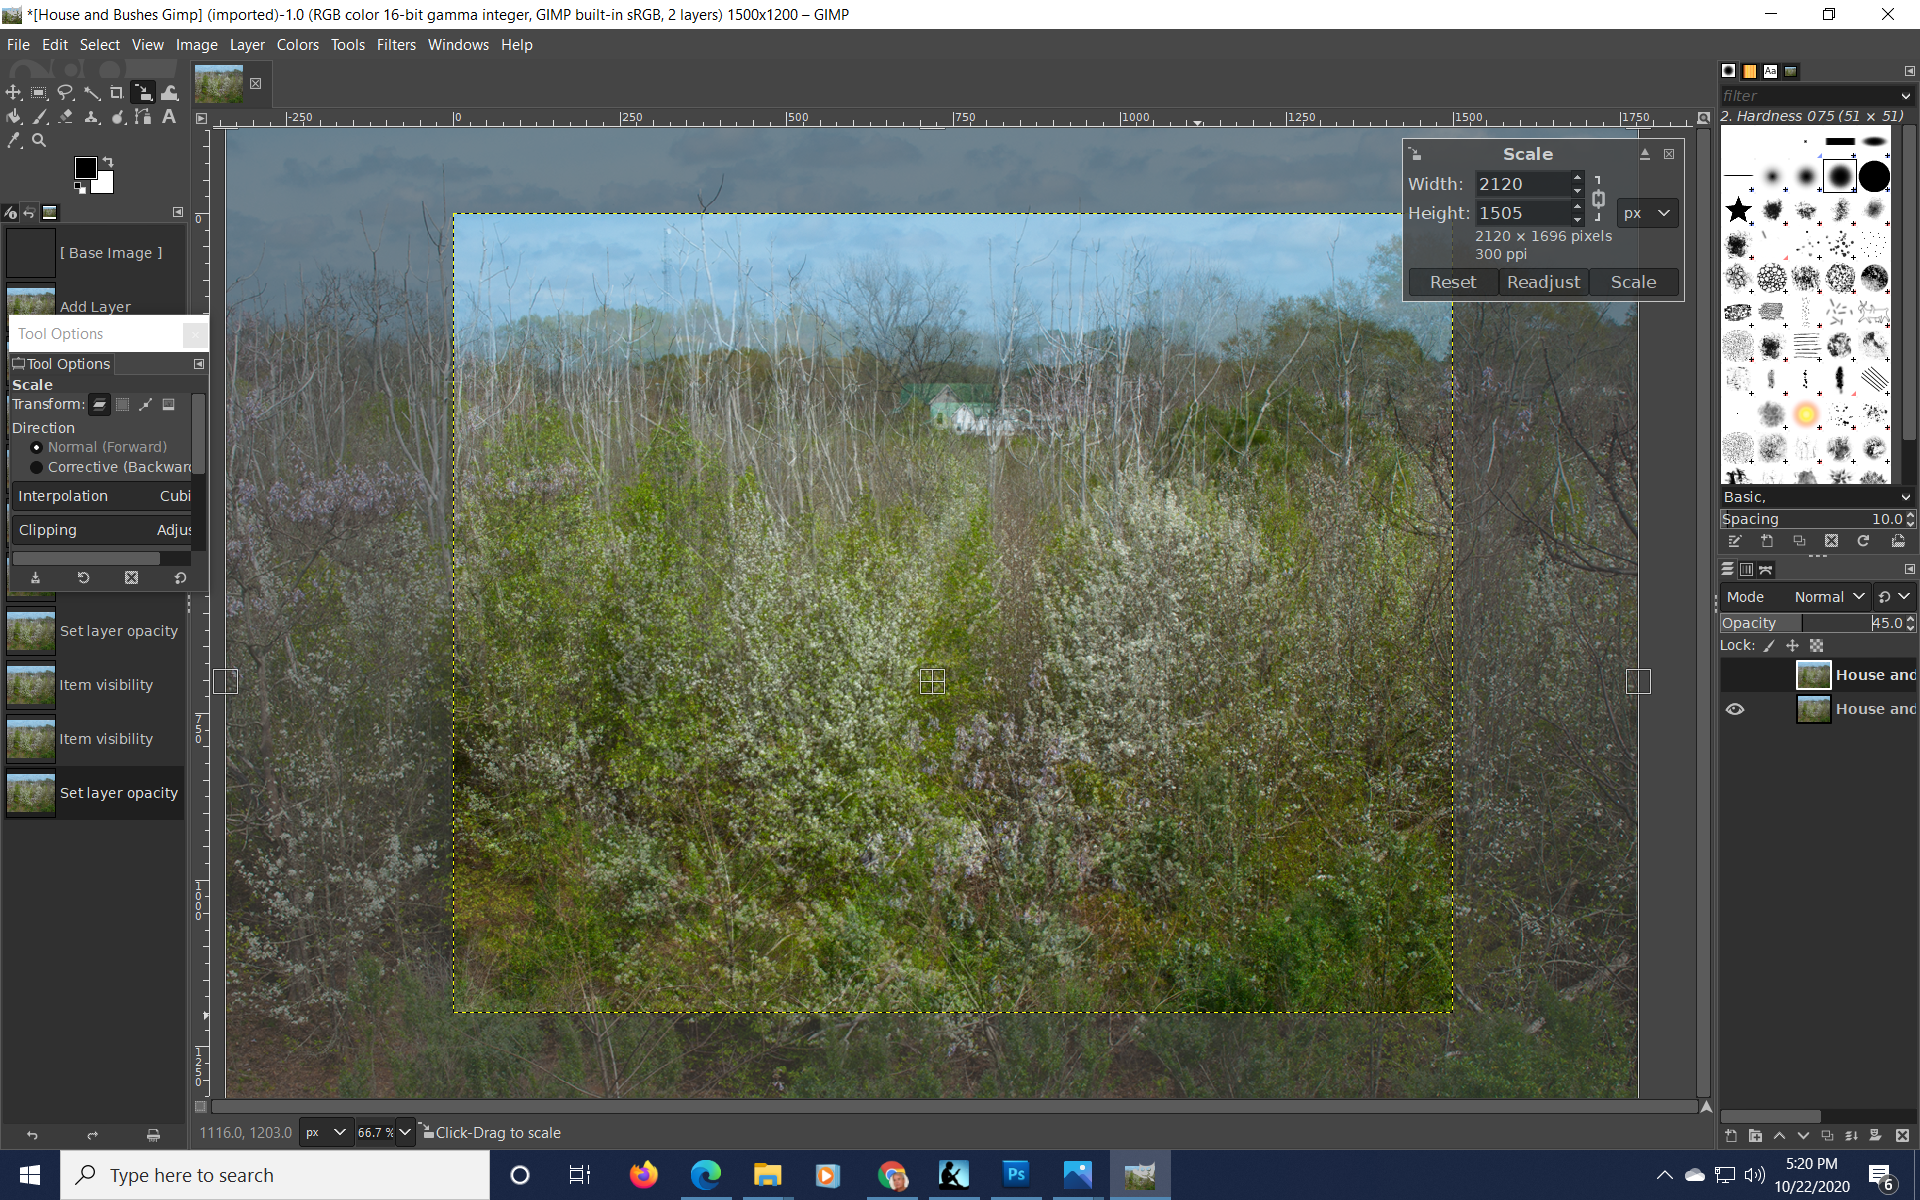
Now you’ll understand why we lowered the density of the upper layer. We’ve made it easy to place the much-larger house above the smaller one.
Get Moving with the Move Tool
When your layer is as big as you can get it, go to the array of tool icons at the upper far left and select the move tool. You’ll be using it to place the “new” house above the old one.
It’s a little tricky, so take your time and do the best you can. Try to place the house with its bottom near to where the smaller house had been. You may need to play with the density setting — up or down to suit your needs. Your picture doesn’t look the greatest now. But hang on. There’s one more step.
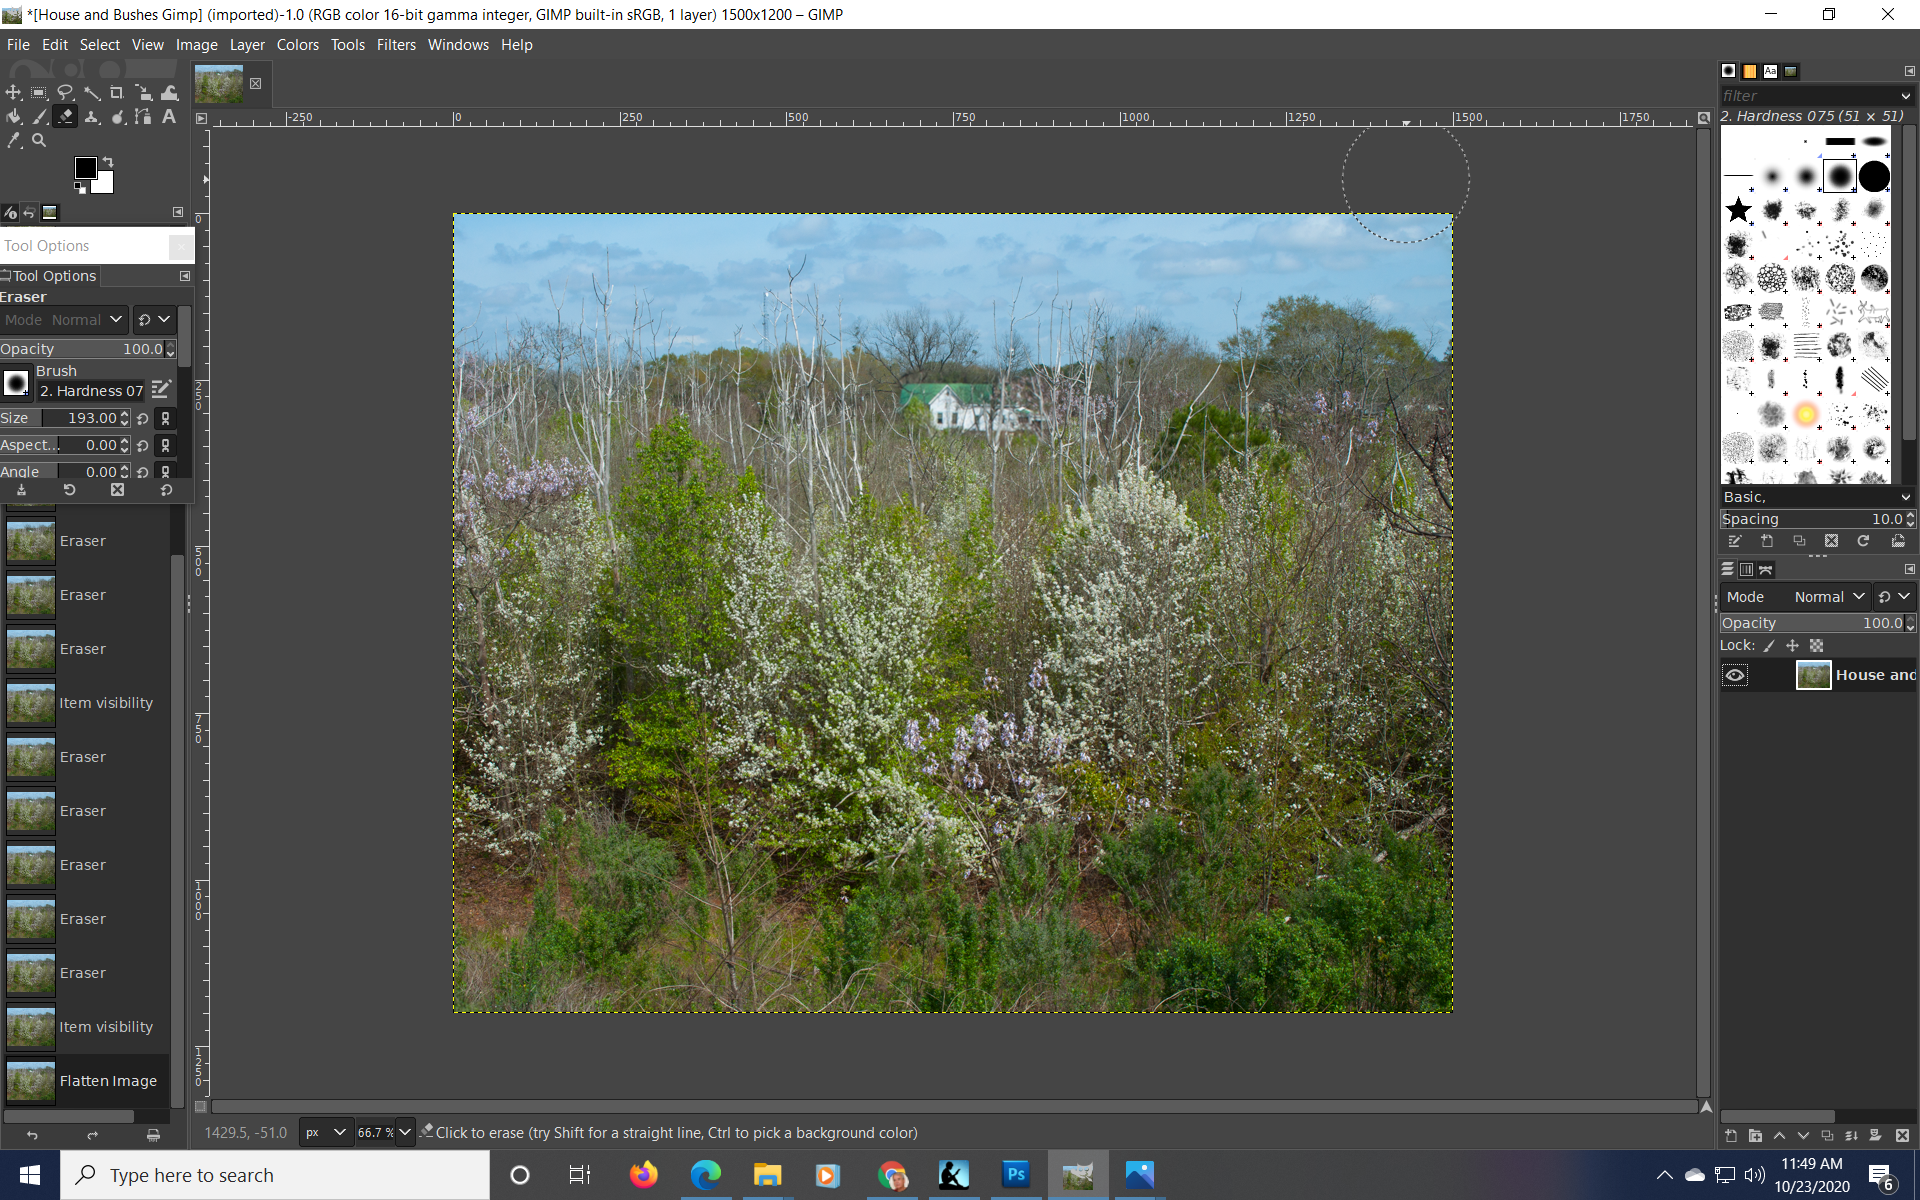
Erase for Success with the Erase Tool
When the house is settled in, open the tools menu, click paint, then eraser tool. In a few seconds, the parts outside the picture frame will disappear. Now you can go to work.
Set the density of the upper layer back to 100, and with the arrows create a hard wide brush. Now use the brush to “erase” most of the upper layer. As you approach the house, narrow your brush so you don’t erase it by mistake.
Can you see what’s happening? You’re removing all the upper layer, except for the house itself. It’s bigger now, of course, which was what we had in mind. The trees and brush around the house help it fit right in.
When you’re finished, click the eye icon on the upper layer off and on again so you can view the difference.
Success!
Congratulations! You’ve resized your first layer in Gimp. Now go to image and click flatten image to merge the layers into one. Finally, go to file, click save, and give yourself a big pat on the back. You’re on your way to more exciting pictures.