
Whether or not to add a watermark is a hotly debated topic, but a watermark is good for keeping your photos safe from theft and promoting brand recognition, among other benefits.
Good news—using Adobe Lightroom, it’s SO easy to add watermarks!
Let’s get started.
Text or Graphics?
Before we can even start this tutorial, you’ll have to decide if you want a text watermark or a graphic watermark.
Choose text watermark if you aren’t overly concerned with your brand or you don’t have a logo. You can create a very effective watermark in Lightroom with just text. There are literally thousands of fonts you can find on the internet for free. Find one that fits you and use it.
If you prefer to use your logo, we will also show you how to add a graphic watermark.
If you need a logo, you can use a website like Canva to easily design a logo and download it to your computer. Then you can use it as your graphic watermark in Lightroom.
Let’s start with a simple text watermark.
Making a text watermark
Step 1: Open Lightroom and import your photos.
From here, edit them as you normally would. This step simply saves time. The image provides a way to effectively anchor and make adjustments to your watermark.
You don’t have to be using Lightroom to edit photos to create a watermark though. You can simply pull up any image from your catalog.
If unfamiliar with adding text, this quick guide will walk you through adding and manipulating text in Lightroom.
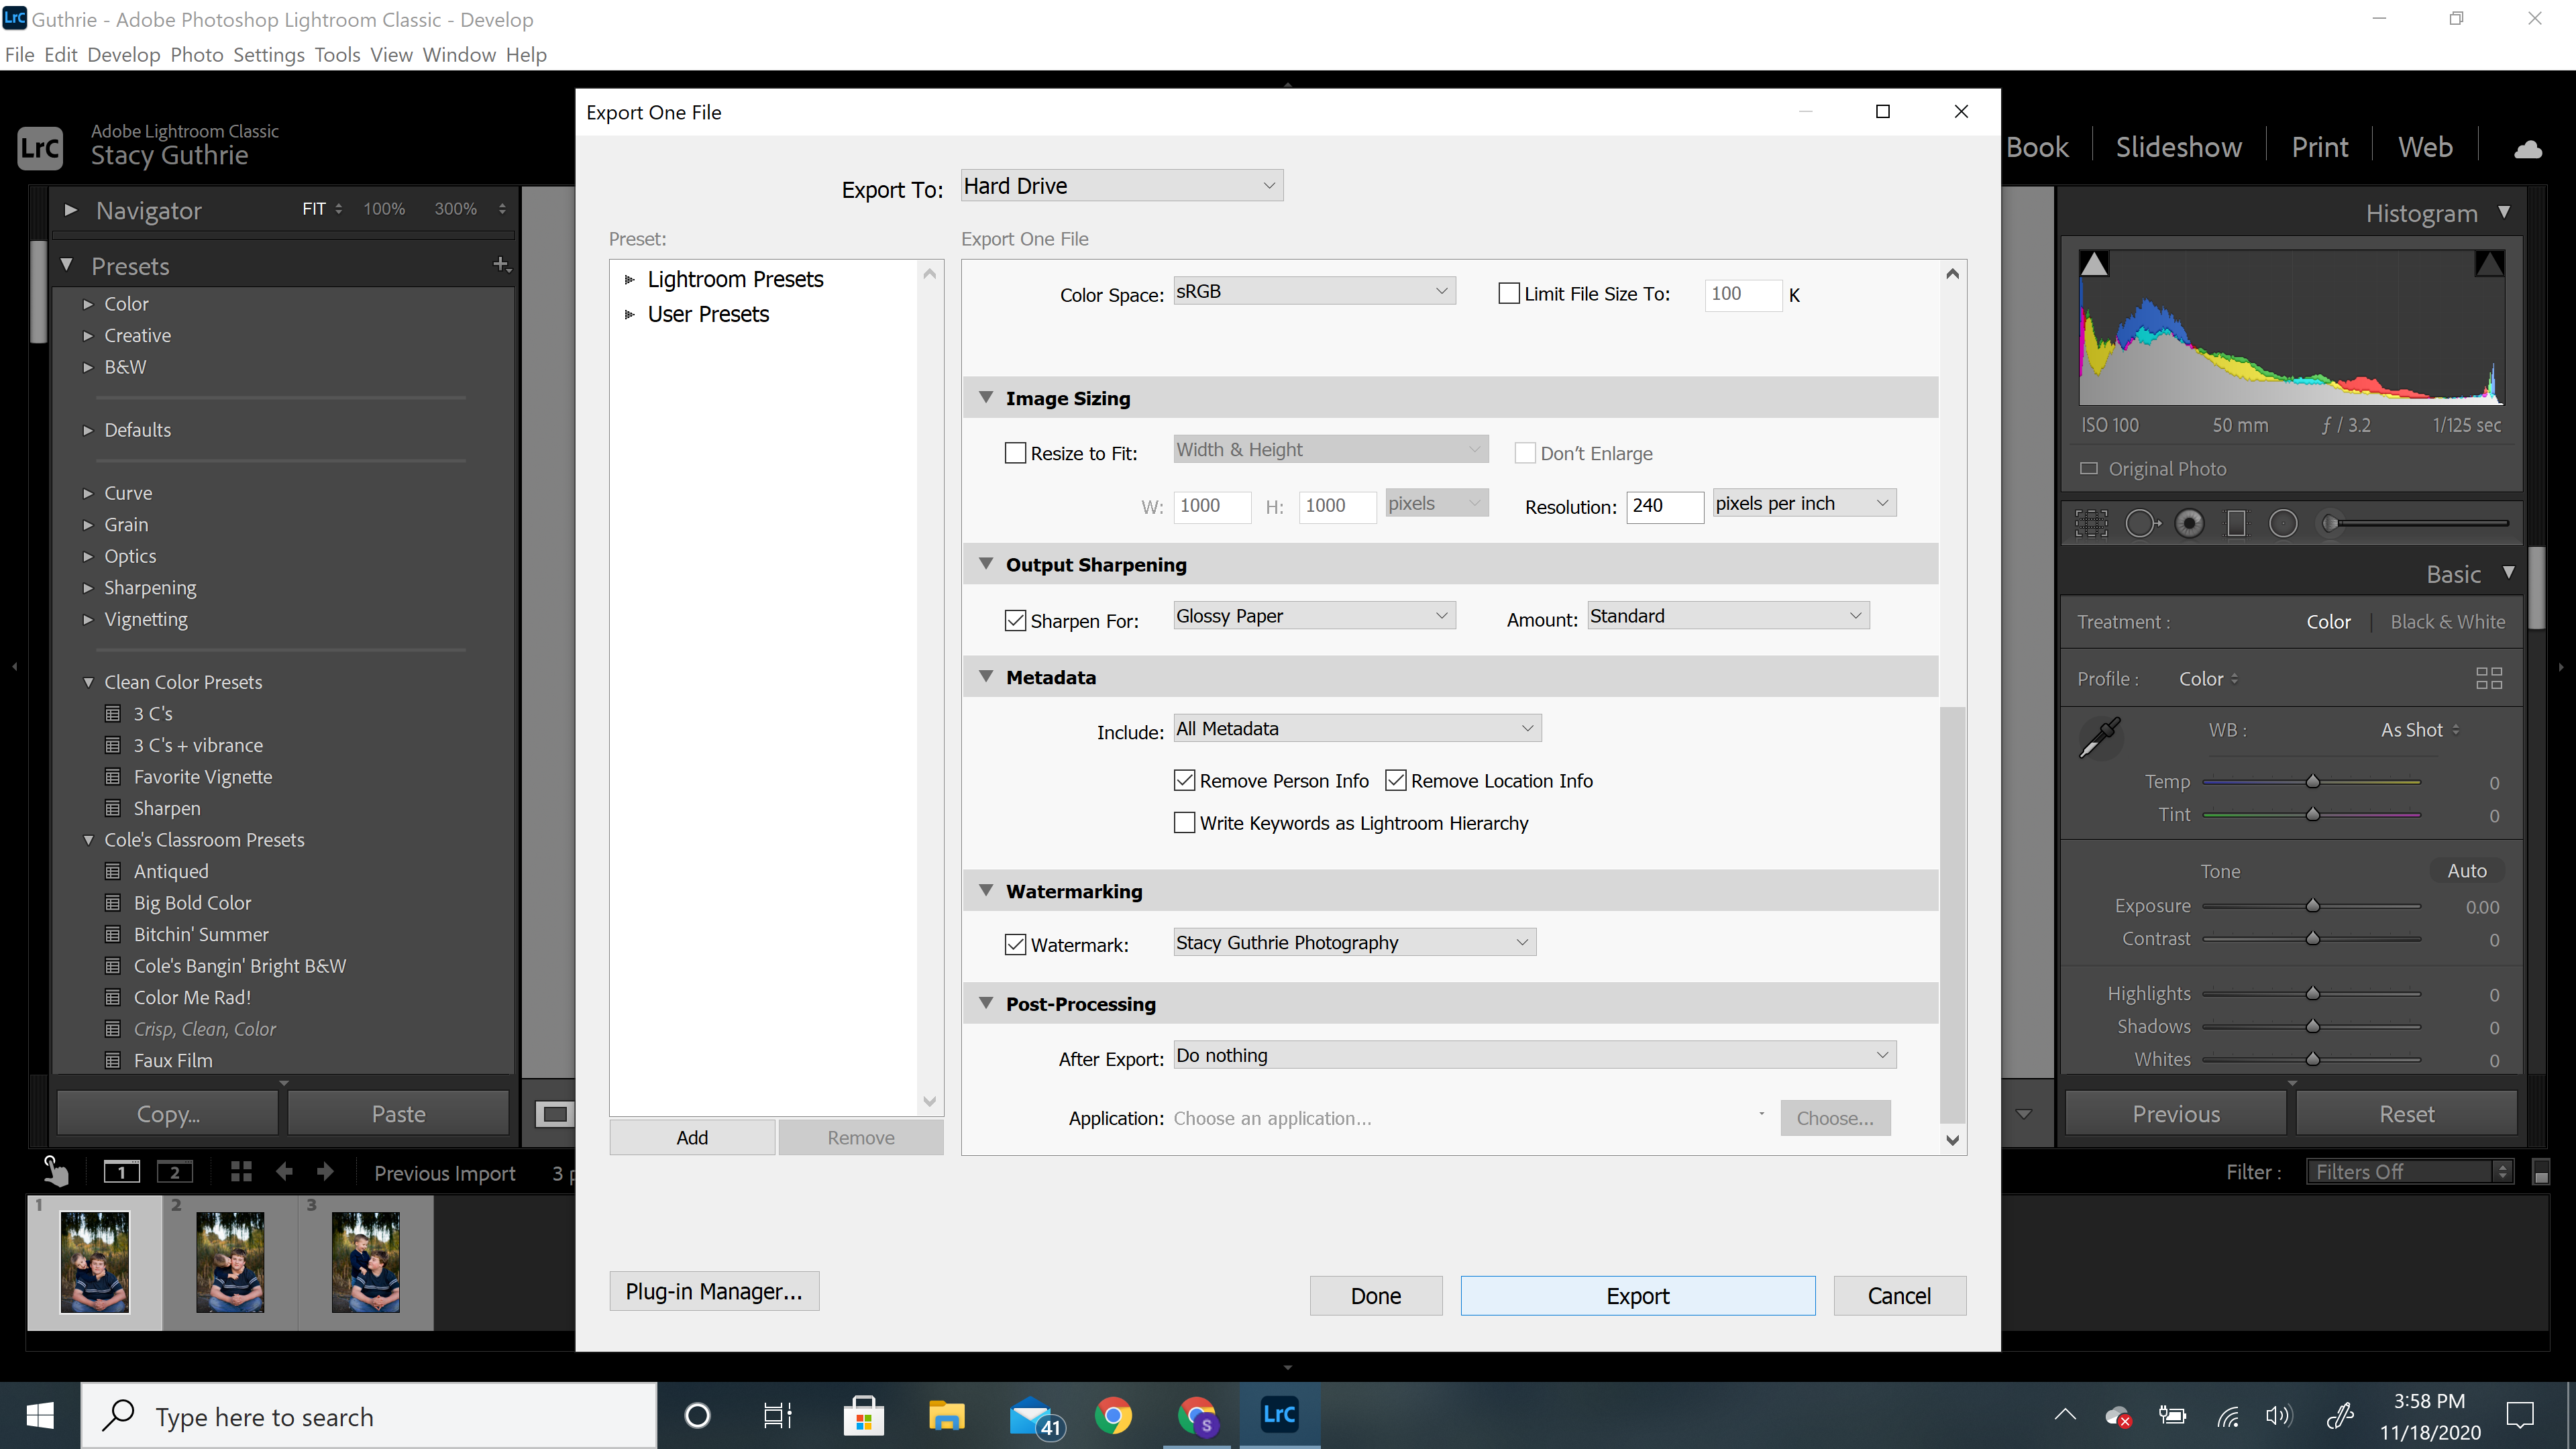
Step 2: Once your photo is edited to your liking, go ahead and click “Export”.
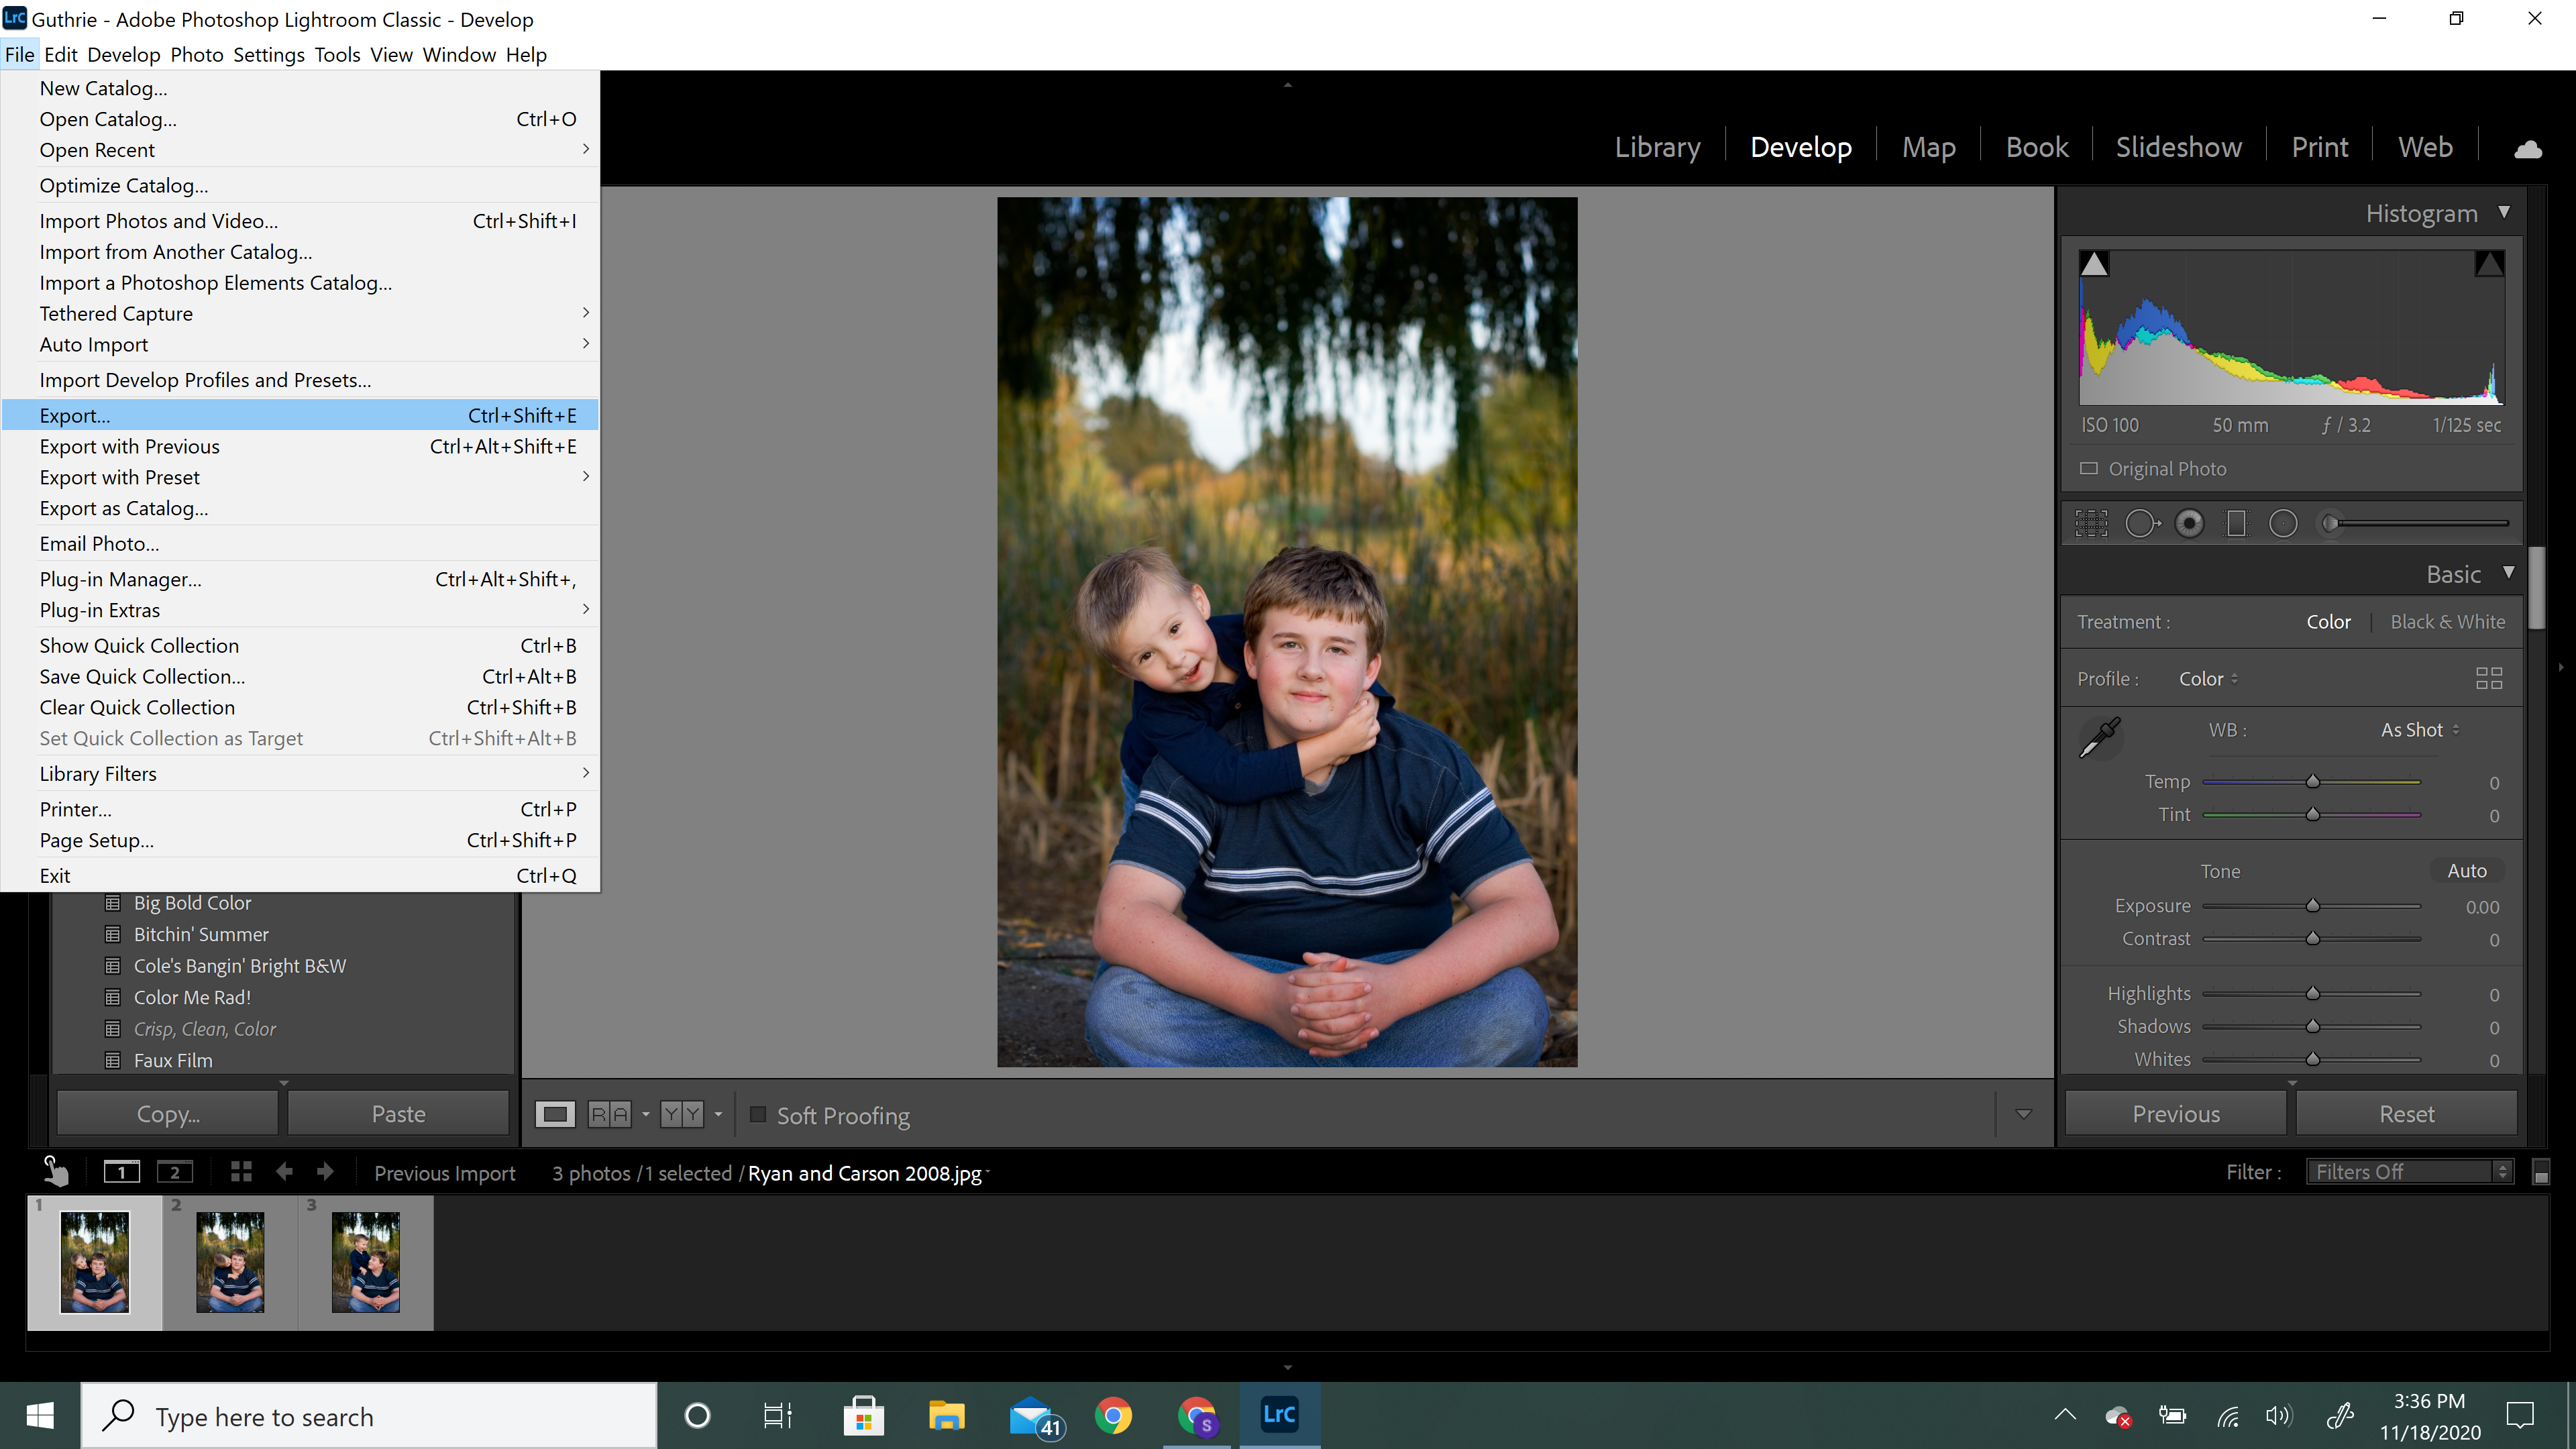
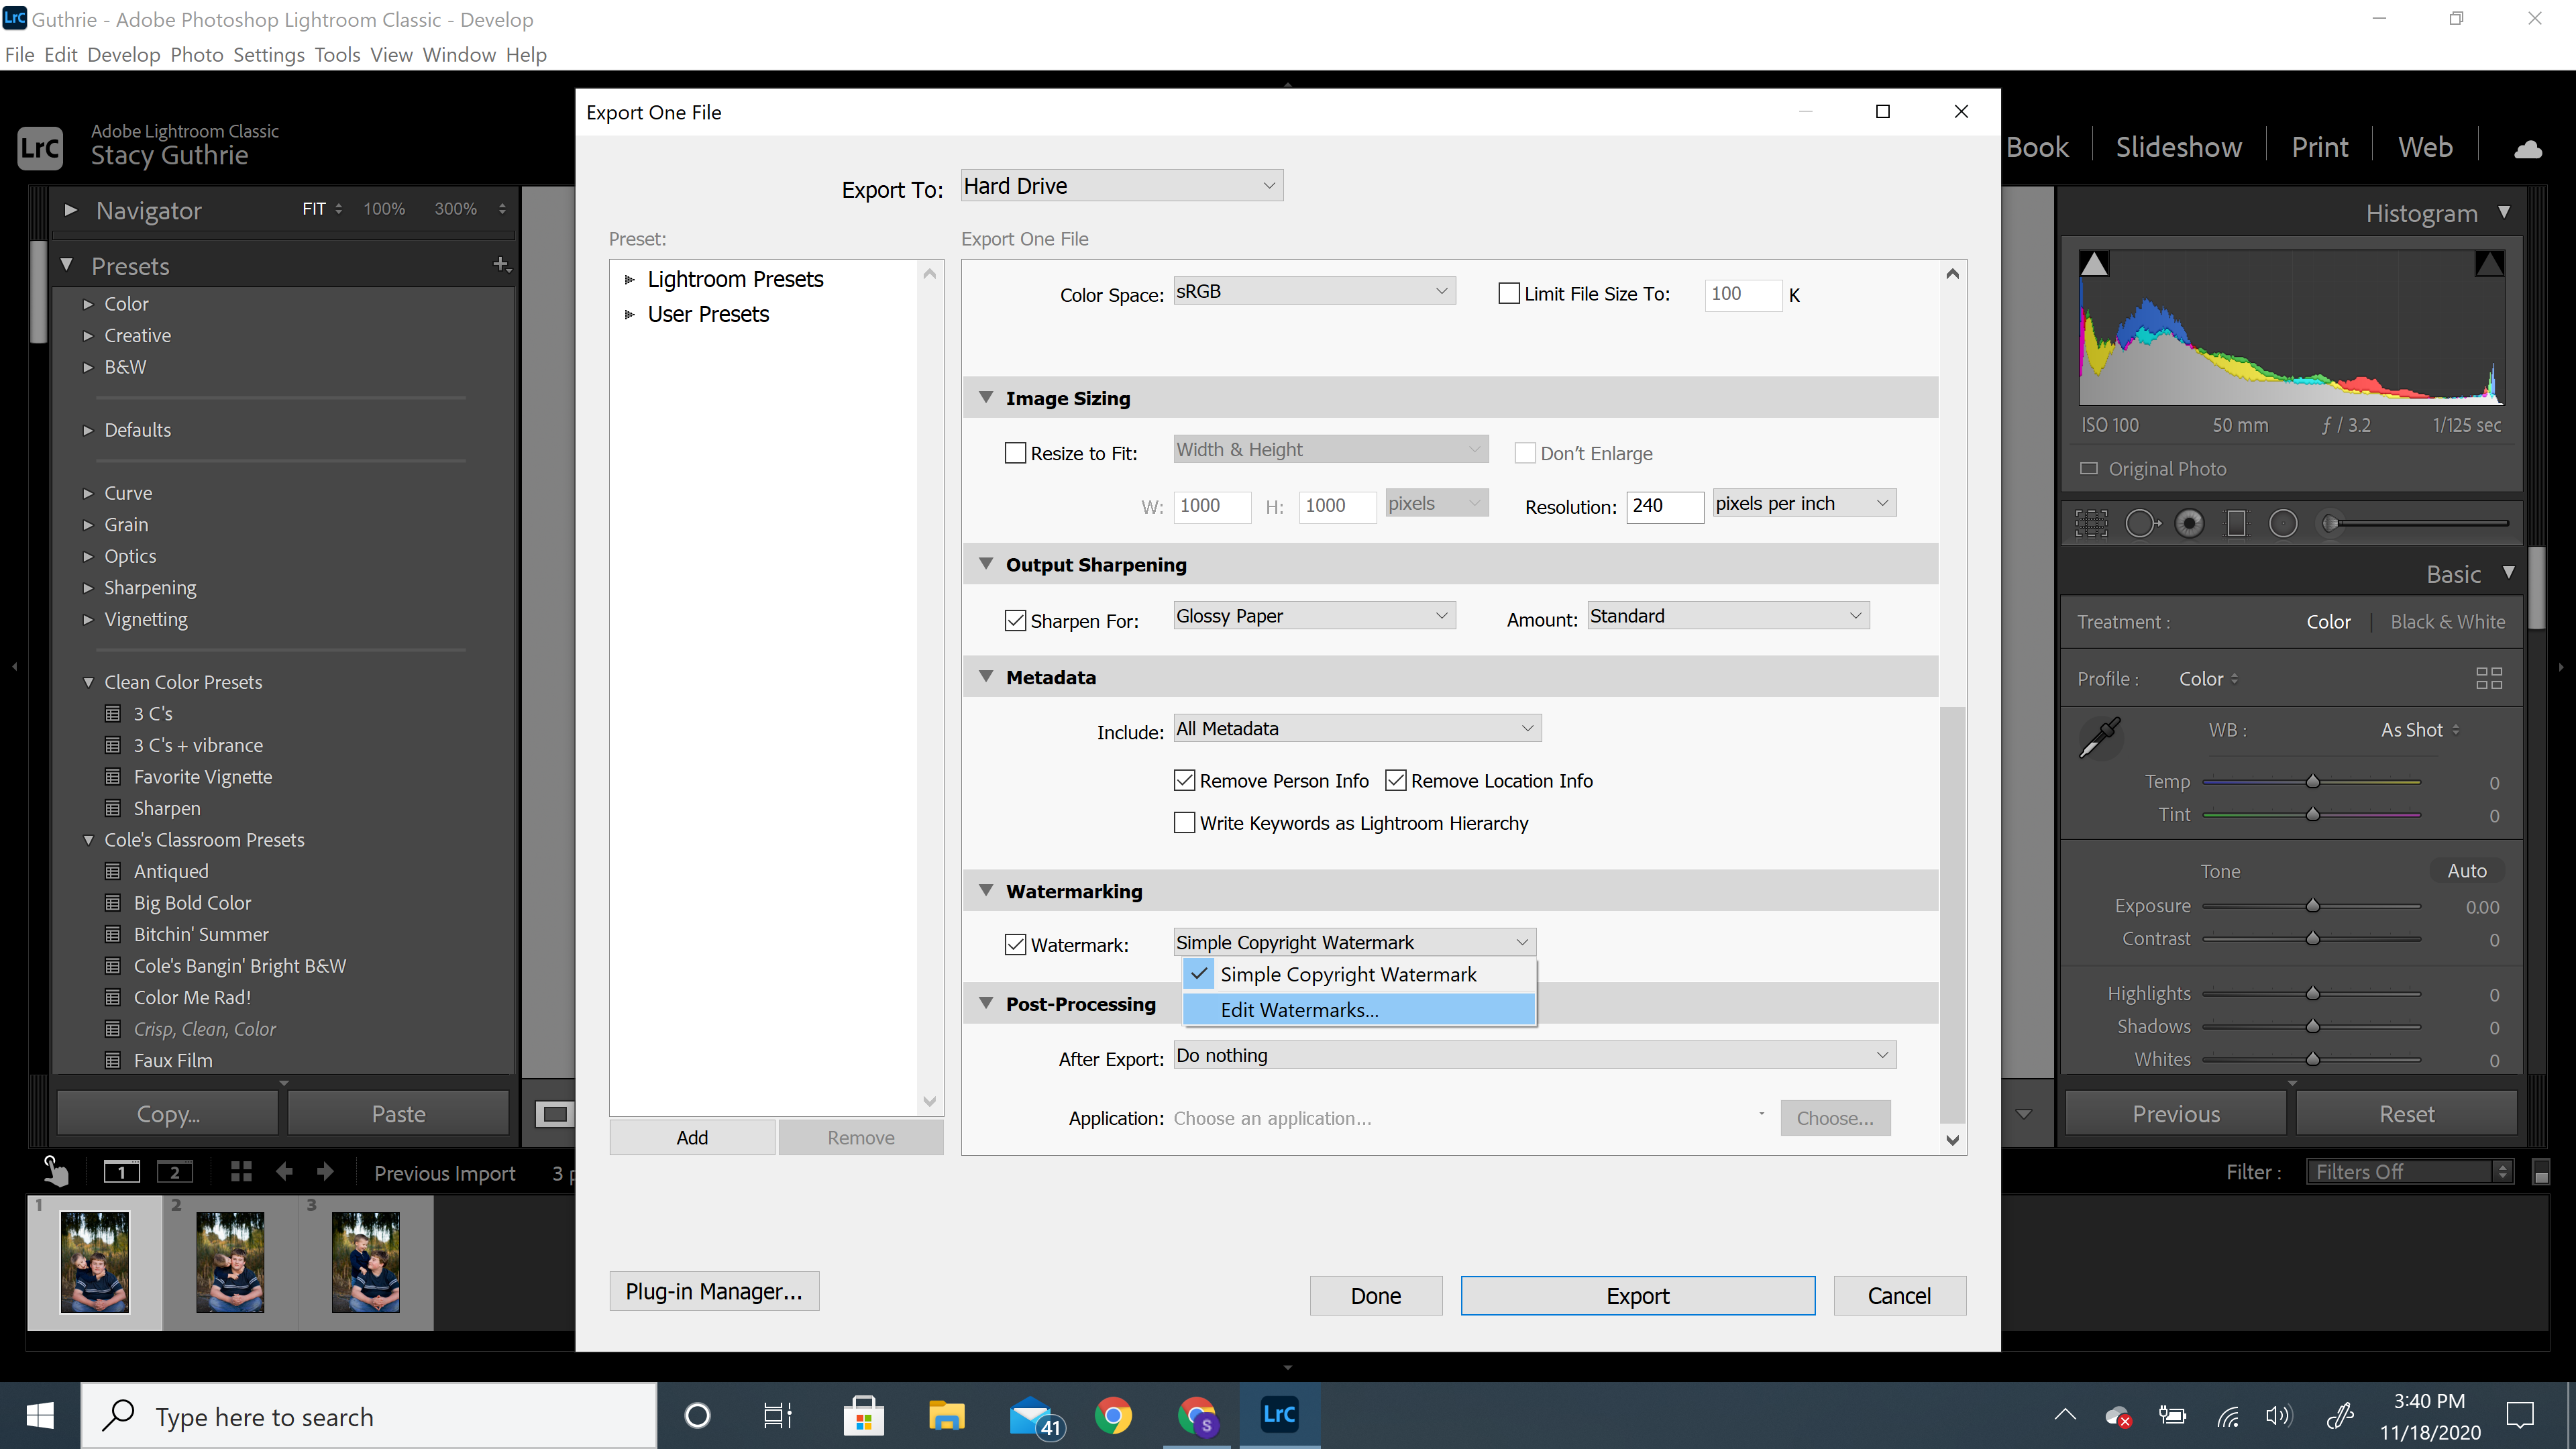
Scroll down to “Watermarking” and check the box. Click the drop-down menu to the right of the box and choose “edit watermarks”.

From here, a box pops up where you will create the watermark, adjust the opacity, and determine its location within your photo.
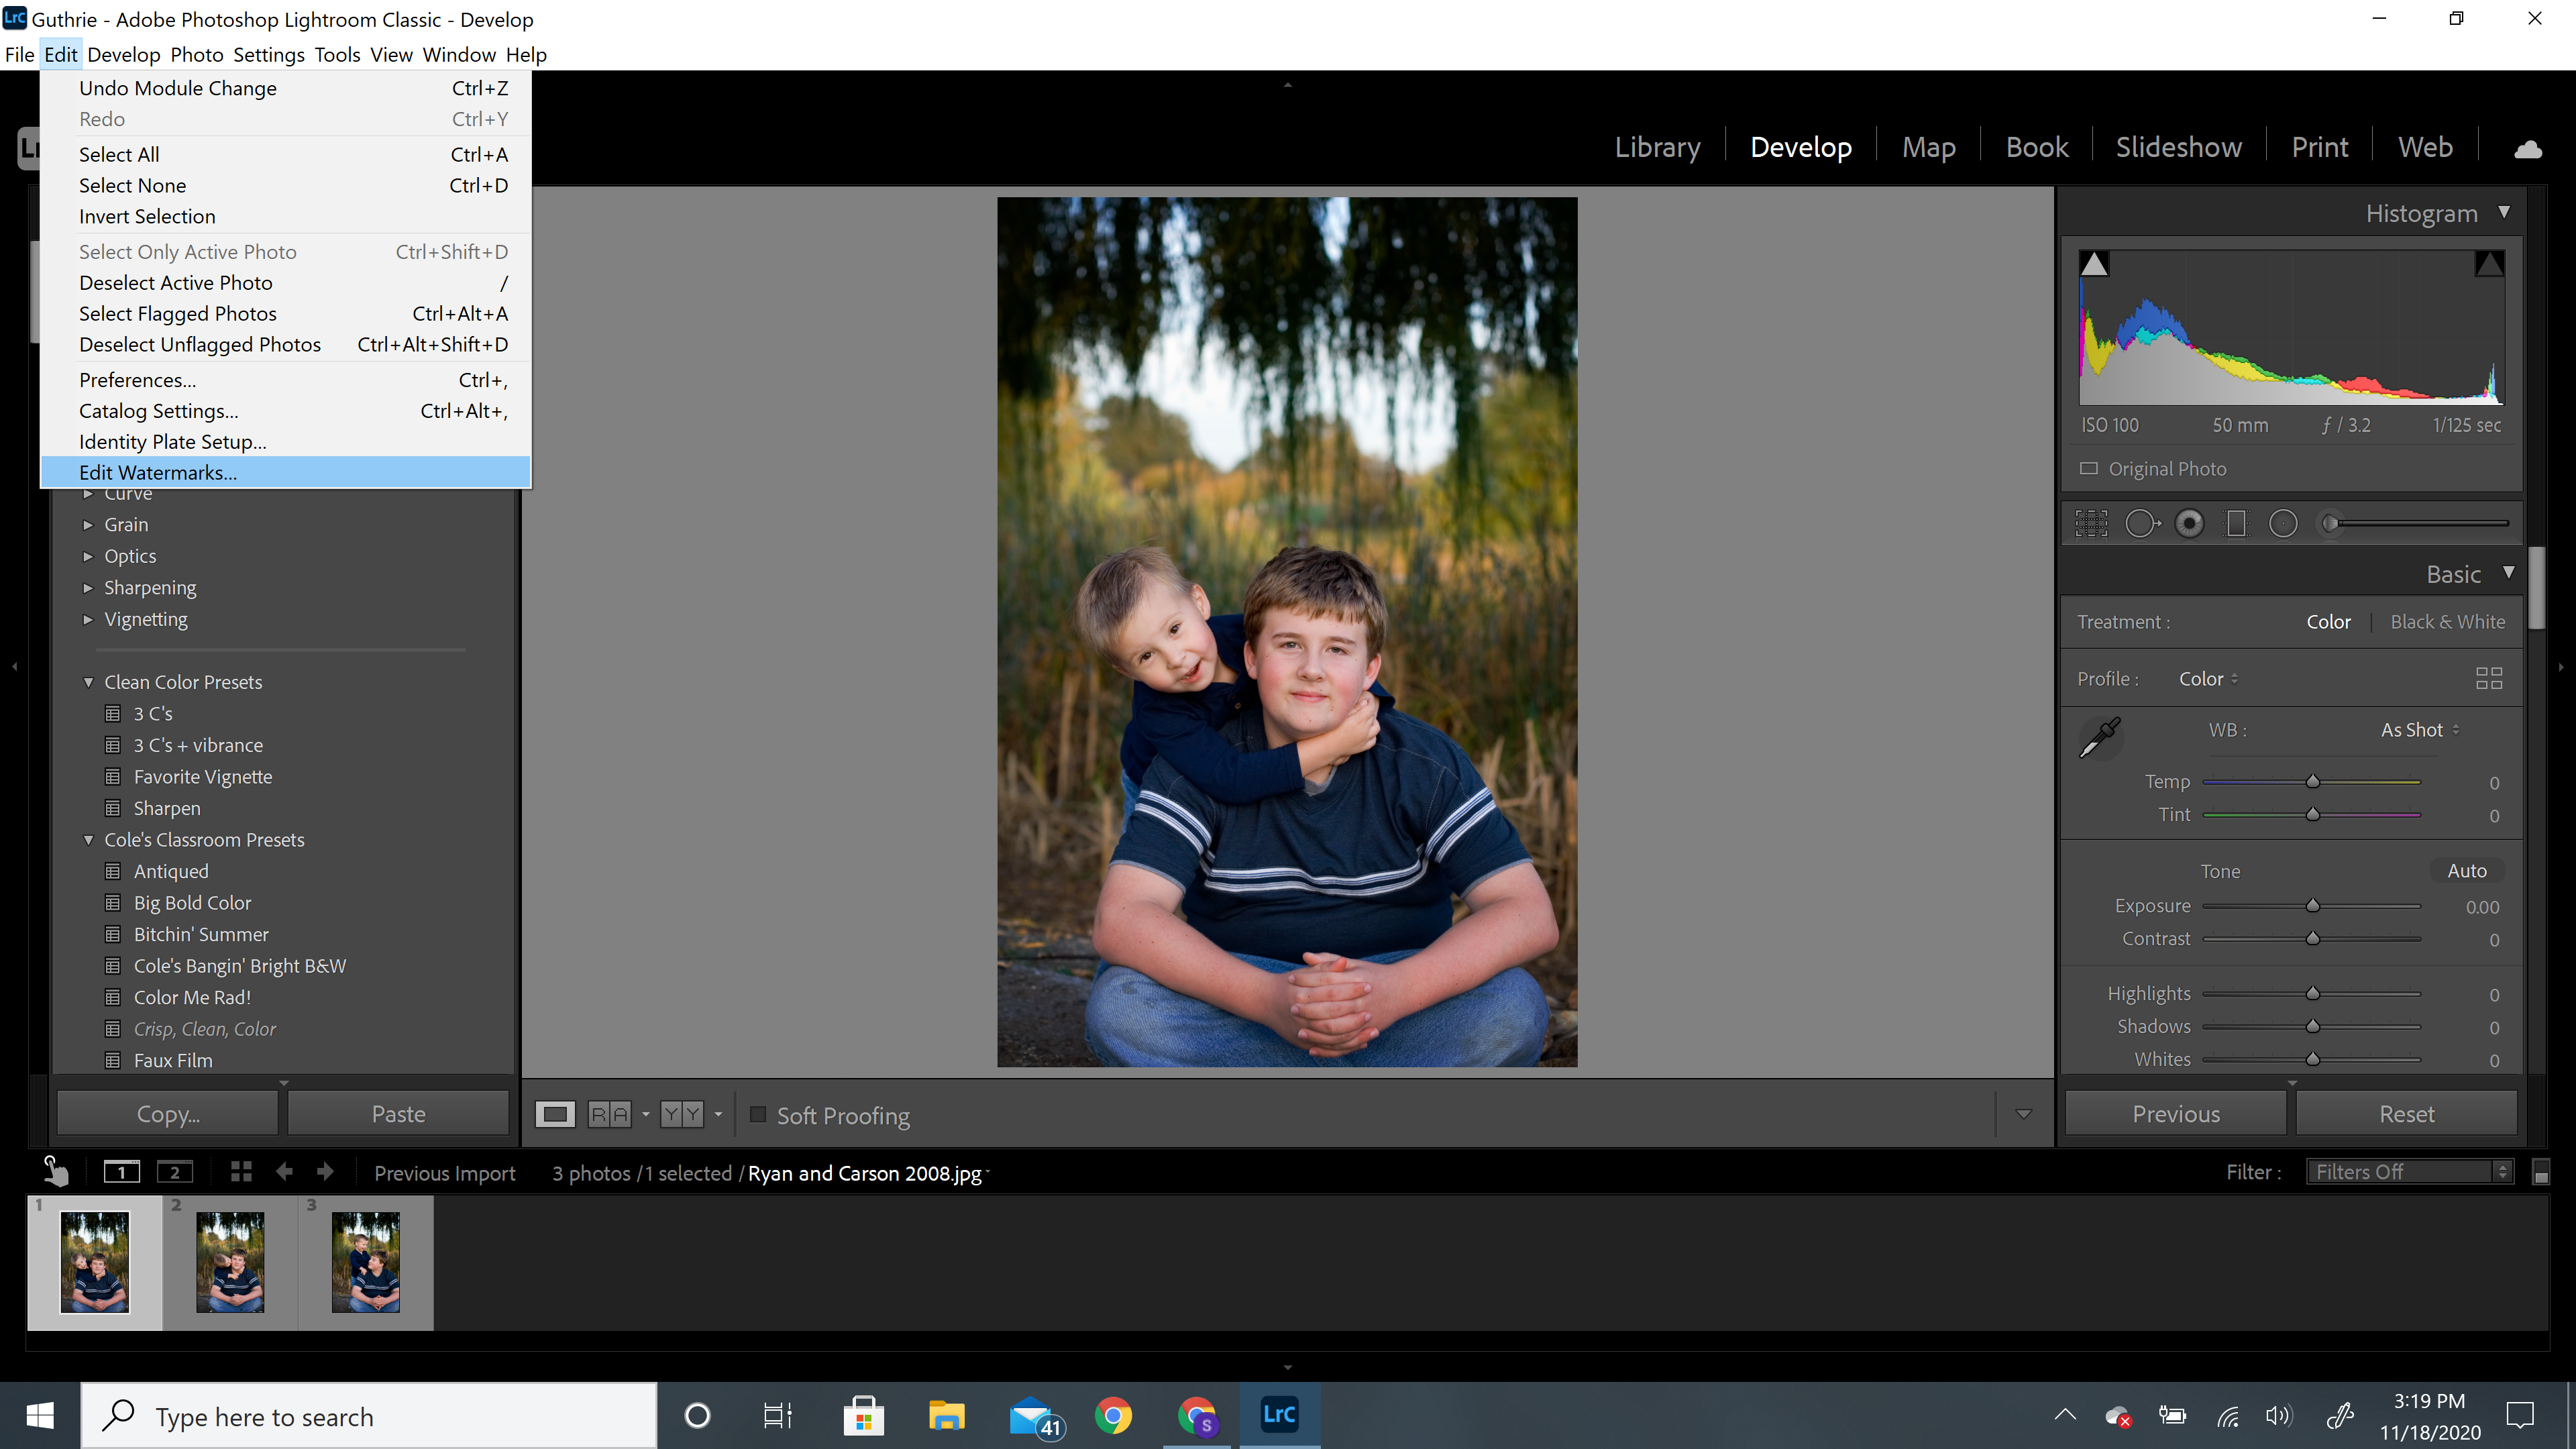
There is another way to get to the same dialog box.
You can click on the “Edit” menu from the top (if you’re using a Mac, you’ll click on the “Lightroom” menu).
Then select “Edit Watermarks”
From here, a box pops up where you will create the watermark, adjust the opacity, and determine its location within your photo.
There is another way to get to the same dialog box.
You can click on the “Edit” menu from the top (if you’re using a Mac, you’ll click on the “Lightroom” menu).
Then select “Edit Watermarks”
Both of these methods will bring you to the same spot:
When the watermark editor box comes up, choose the “Text” Box.
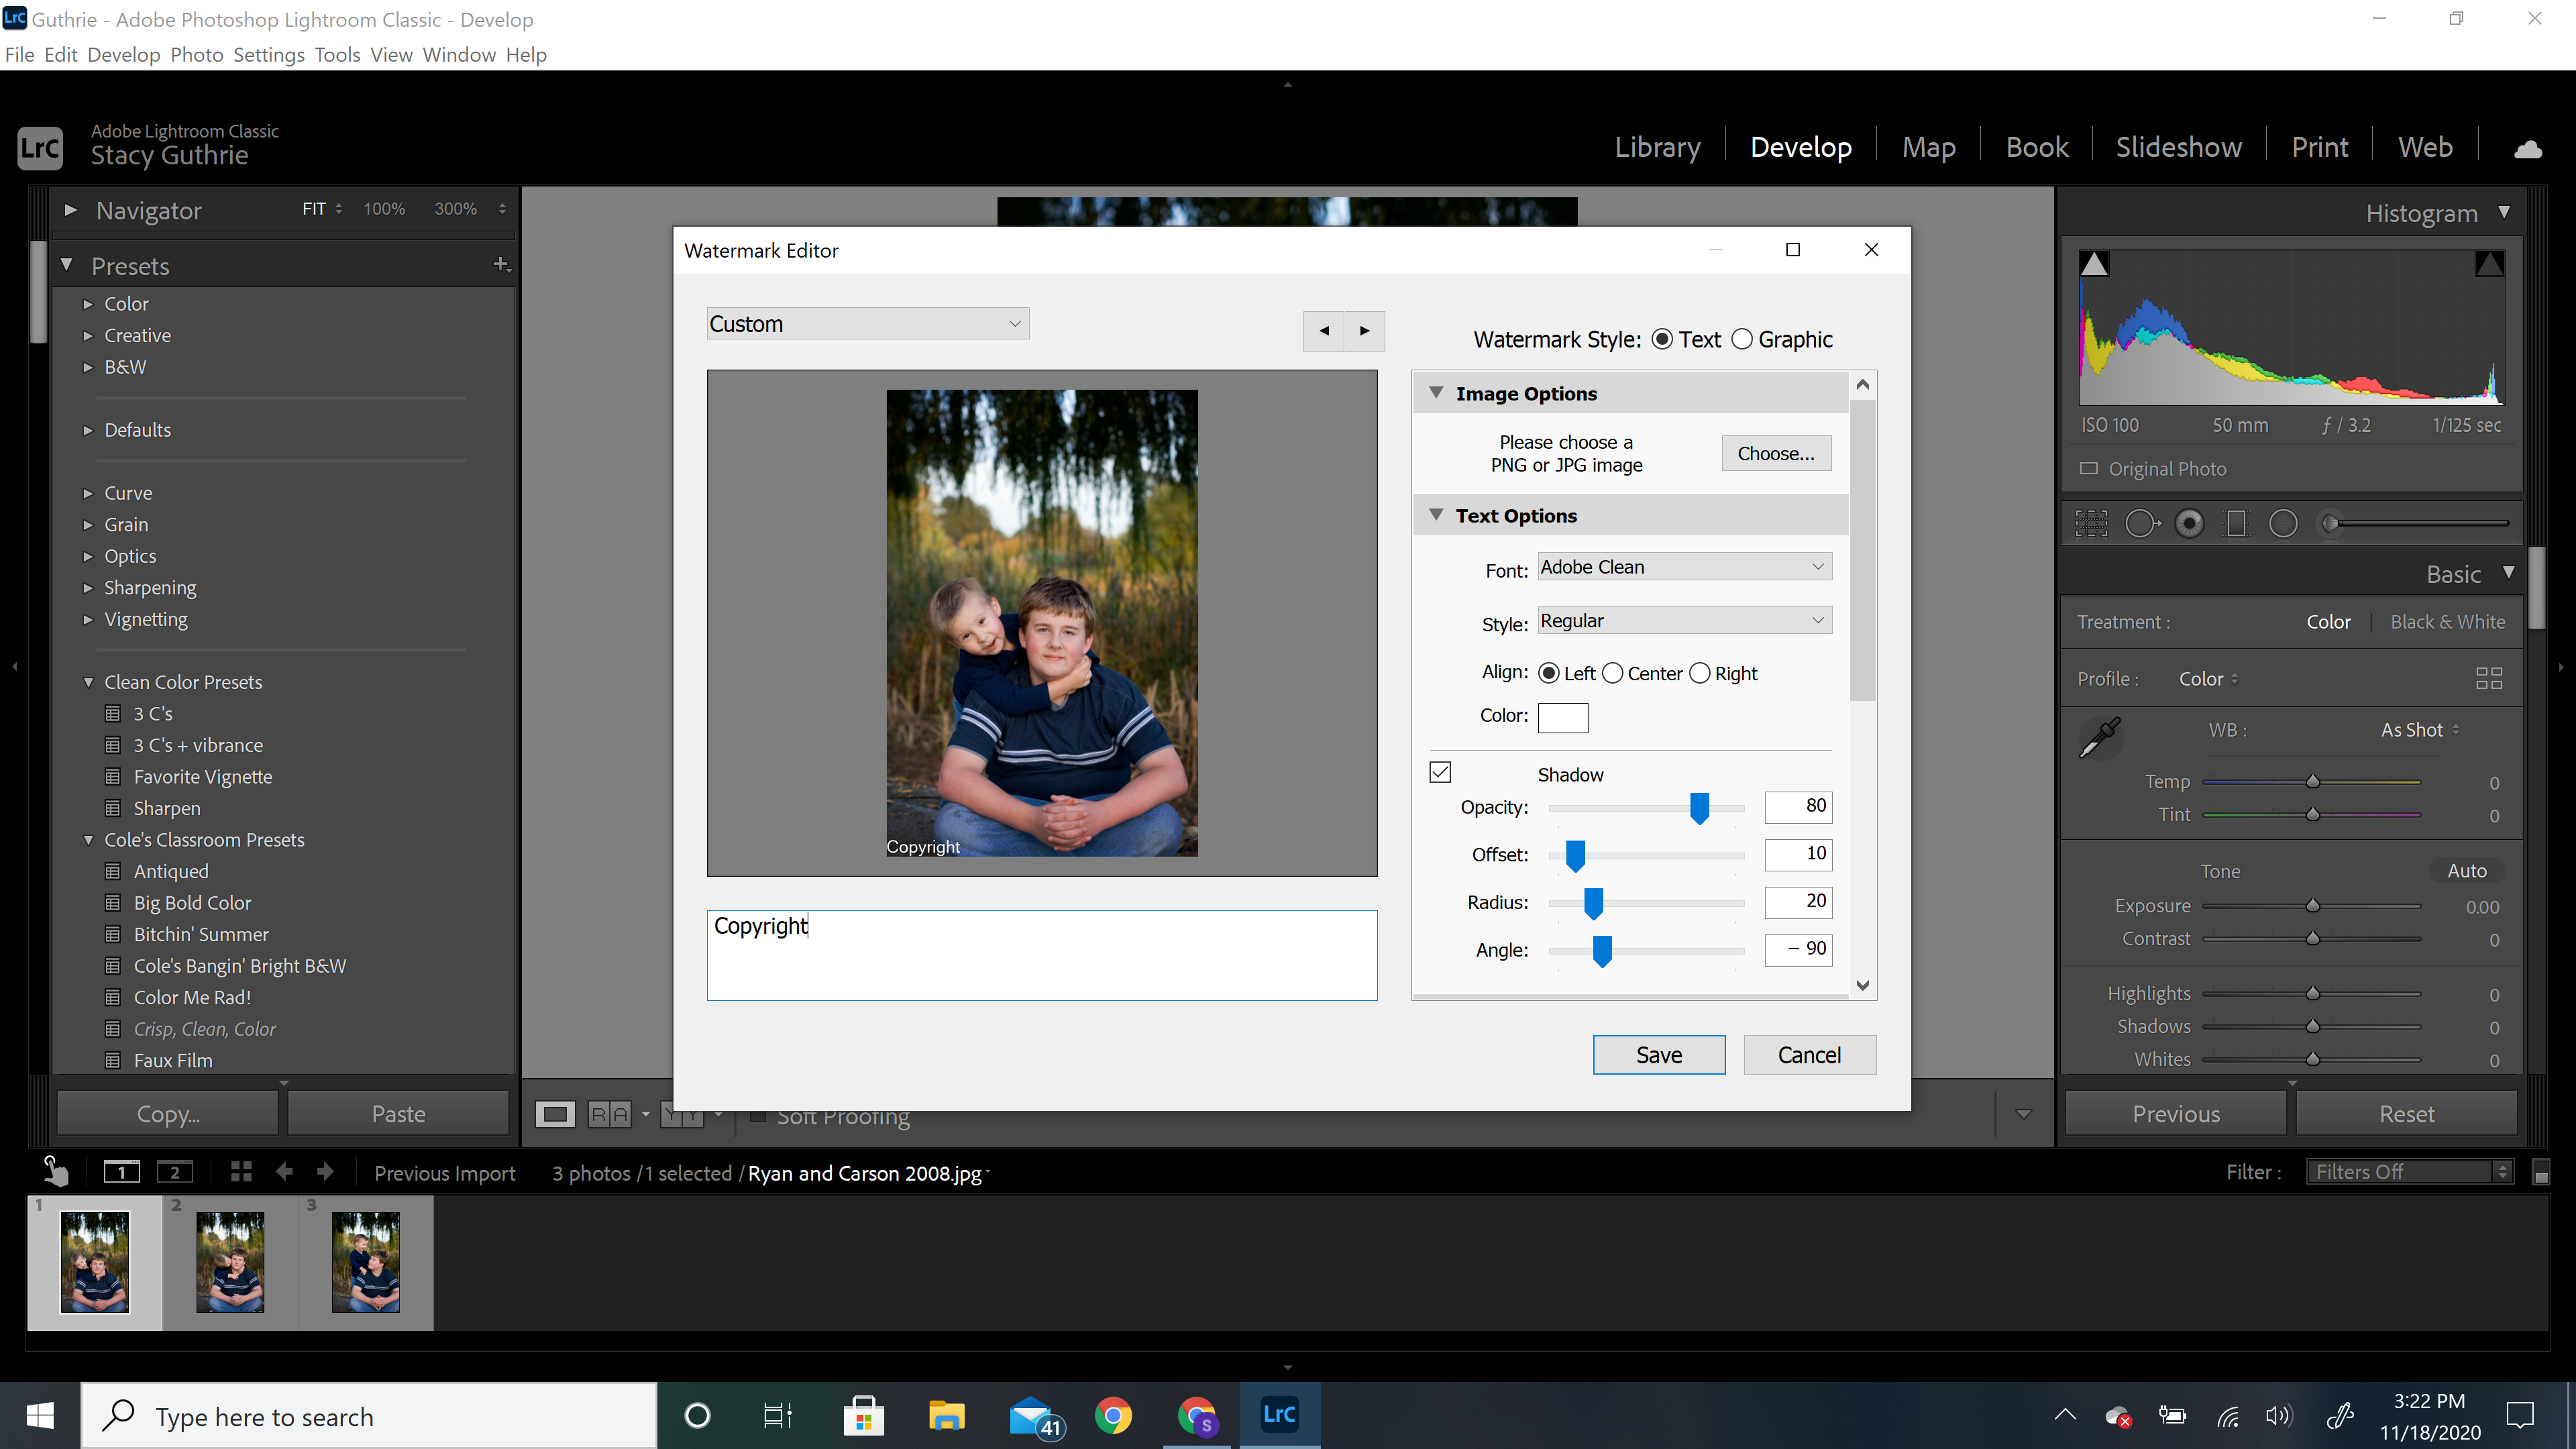
Step 3: Type your text into the box below your photo. The word “copyright” is the default. You can add your name to that or remove it and just put your name. Or, you can put your company name. You can even just put “proof”.
It’s up to you and how your photos will be used. Type the text you want to use for your watermark.
Step 4: Make adjustments. As you can see, you have many text options. You can choose a font for your watermark as well as grayscale color (white usually is a good choice). You can also adjust the opacity a bit and make a drop shadow effect.
As you scroll down, you will see a set of 9 circles. This is how you choose the anchor point for your watermark. The default is bottom left.
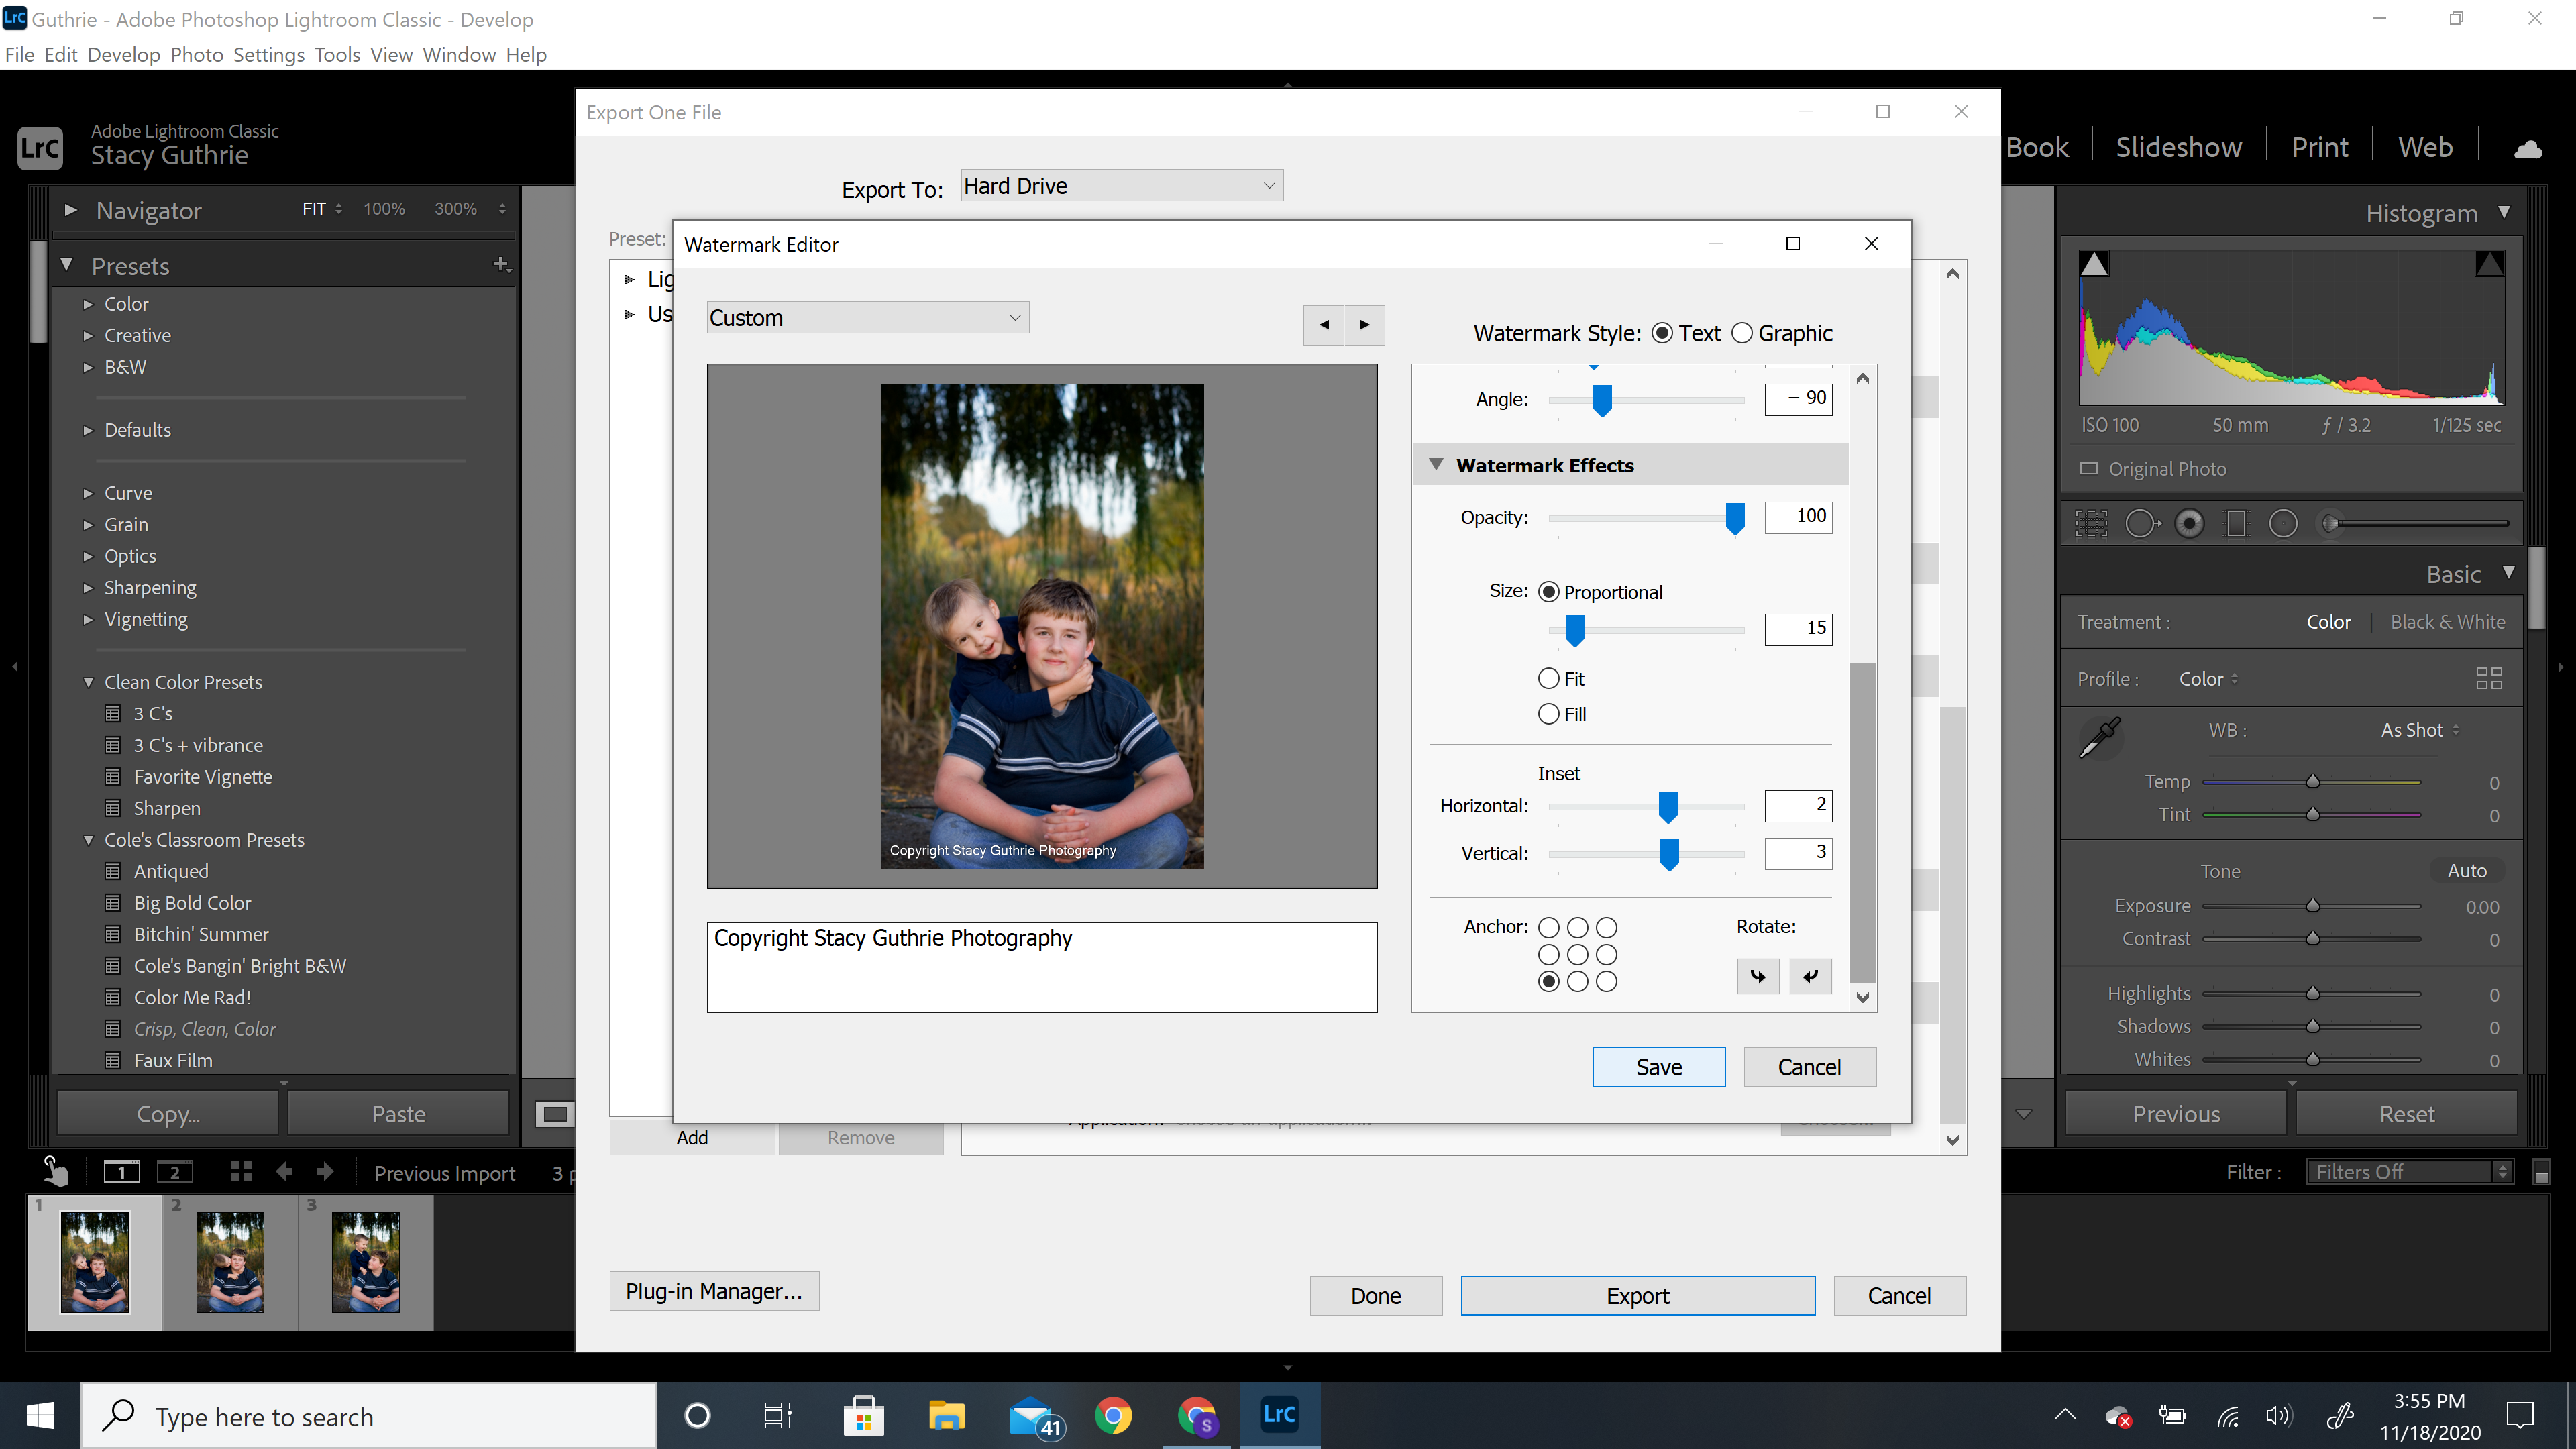
Make sure you keep in mind that this will be placed on all the images you are exporting in the same place. Pick a placement that works for all/most of your photos.
You can also rotate the text to appear horizontally or vertically. Once you decide on the location and orientation, use the horizontal and vertical sliders to pull the text away from the sides slightly and position it just right.
Once you’re happy, click “Save” .
You’ll be prompted to name your watermark. You may want to create different watermarks for different purposes. Once you’ve named it, select “Create”.
Continue with your export. The watermark will be added to each photo in the batch export, in the exact same spot.
In the future, when you export photos, the watermark will be saved but be sure to click the “watermarking” box in the export preferences box to apply it to your batch export.

Using a graphic watermark
So, the steps for creating a graphic watermark are almost identical to the text watermark.
Except, you’re going to pick a PNG or JPEG image instead of typing text into the box.
Here’s the catch.
You need a PNG or JPEG image with a transparent background to use as a graphic watermark in Lightroom. Otherwise, it’s going to be a big clunky square in your photo.
If you already have a logo, but it doesn’t have a transparent background, you can easily pull it into Photoshop or use a free online option like Canva and make the background layer transparent.
Once you have that, you can proceed through the steps. Start in Lightroom in the Develop module with a photo on deck as before.
Step 1: Select “Edit” from the top menu, then click “Edit Watermarks”.

Step 2: Select “graphic” at the top of the watermark effects dialog box. A new box will open and you can choose your saved JPEG or PNG file. Once you’ve selected the file,

click “choose”.
The graphic will show up in the default lower left corner.

Step 3: Make adjustments. You can adjust the opacity and as you scroll down you’ll see 9 circles. These are the anchor points where you can anchor your watermark to a certain location on your image. The default is bottom left.
You can also rotate the graphic to show horizontally or vertically. Then, use the horizontal and vertical sliders to pull the text away from the sides slightly.
When it looks just right, choose the “Save” button.
You’ll be prompted to name your watermark. Once you’ve named it, hit “Create”.
Now you can export your photos. The watermark will be added to each photo in the export, in the exact same spot.
In the future, when you export photos, the watermark will be saved but be sure to click the “watermarking” box in the export preferences box.
If you want to make a logo or graphic…
And Photoshop is a little more committed than you have time for, you can easily create a logo in a program like Canva that you can use as a watermark.
Whether you choose a text or graphic watermark, using Adobe Lightroom’s batch export feature makes it super easy to apply your watermark to all of your photos which saves you time. So you can get back to taking more photos.